Back to 4. Include Map dashboards
Continue to 6. Filter Map dashbords
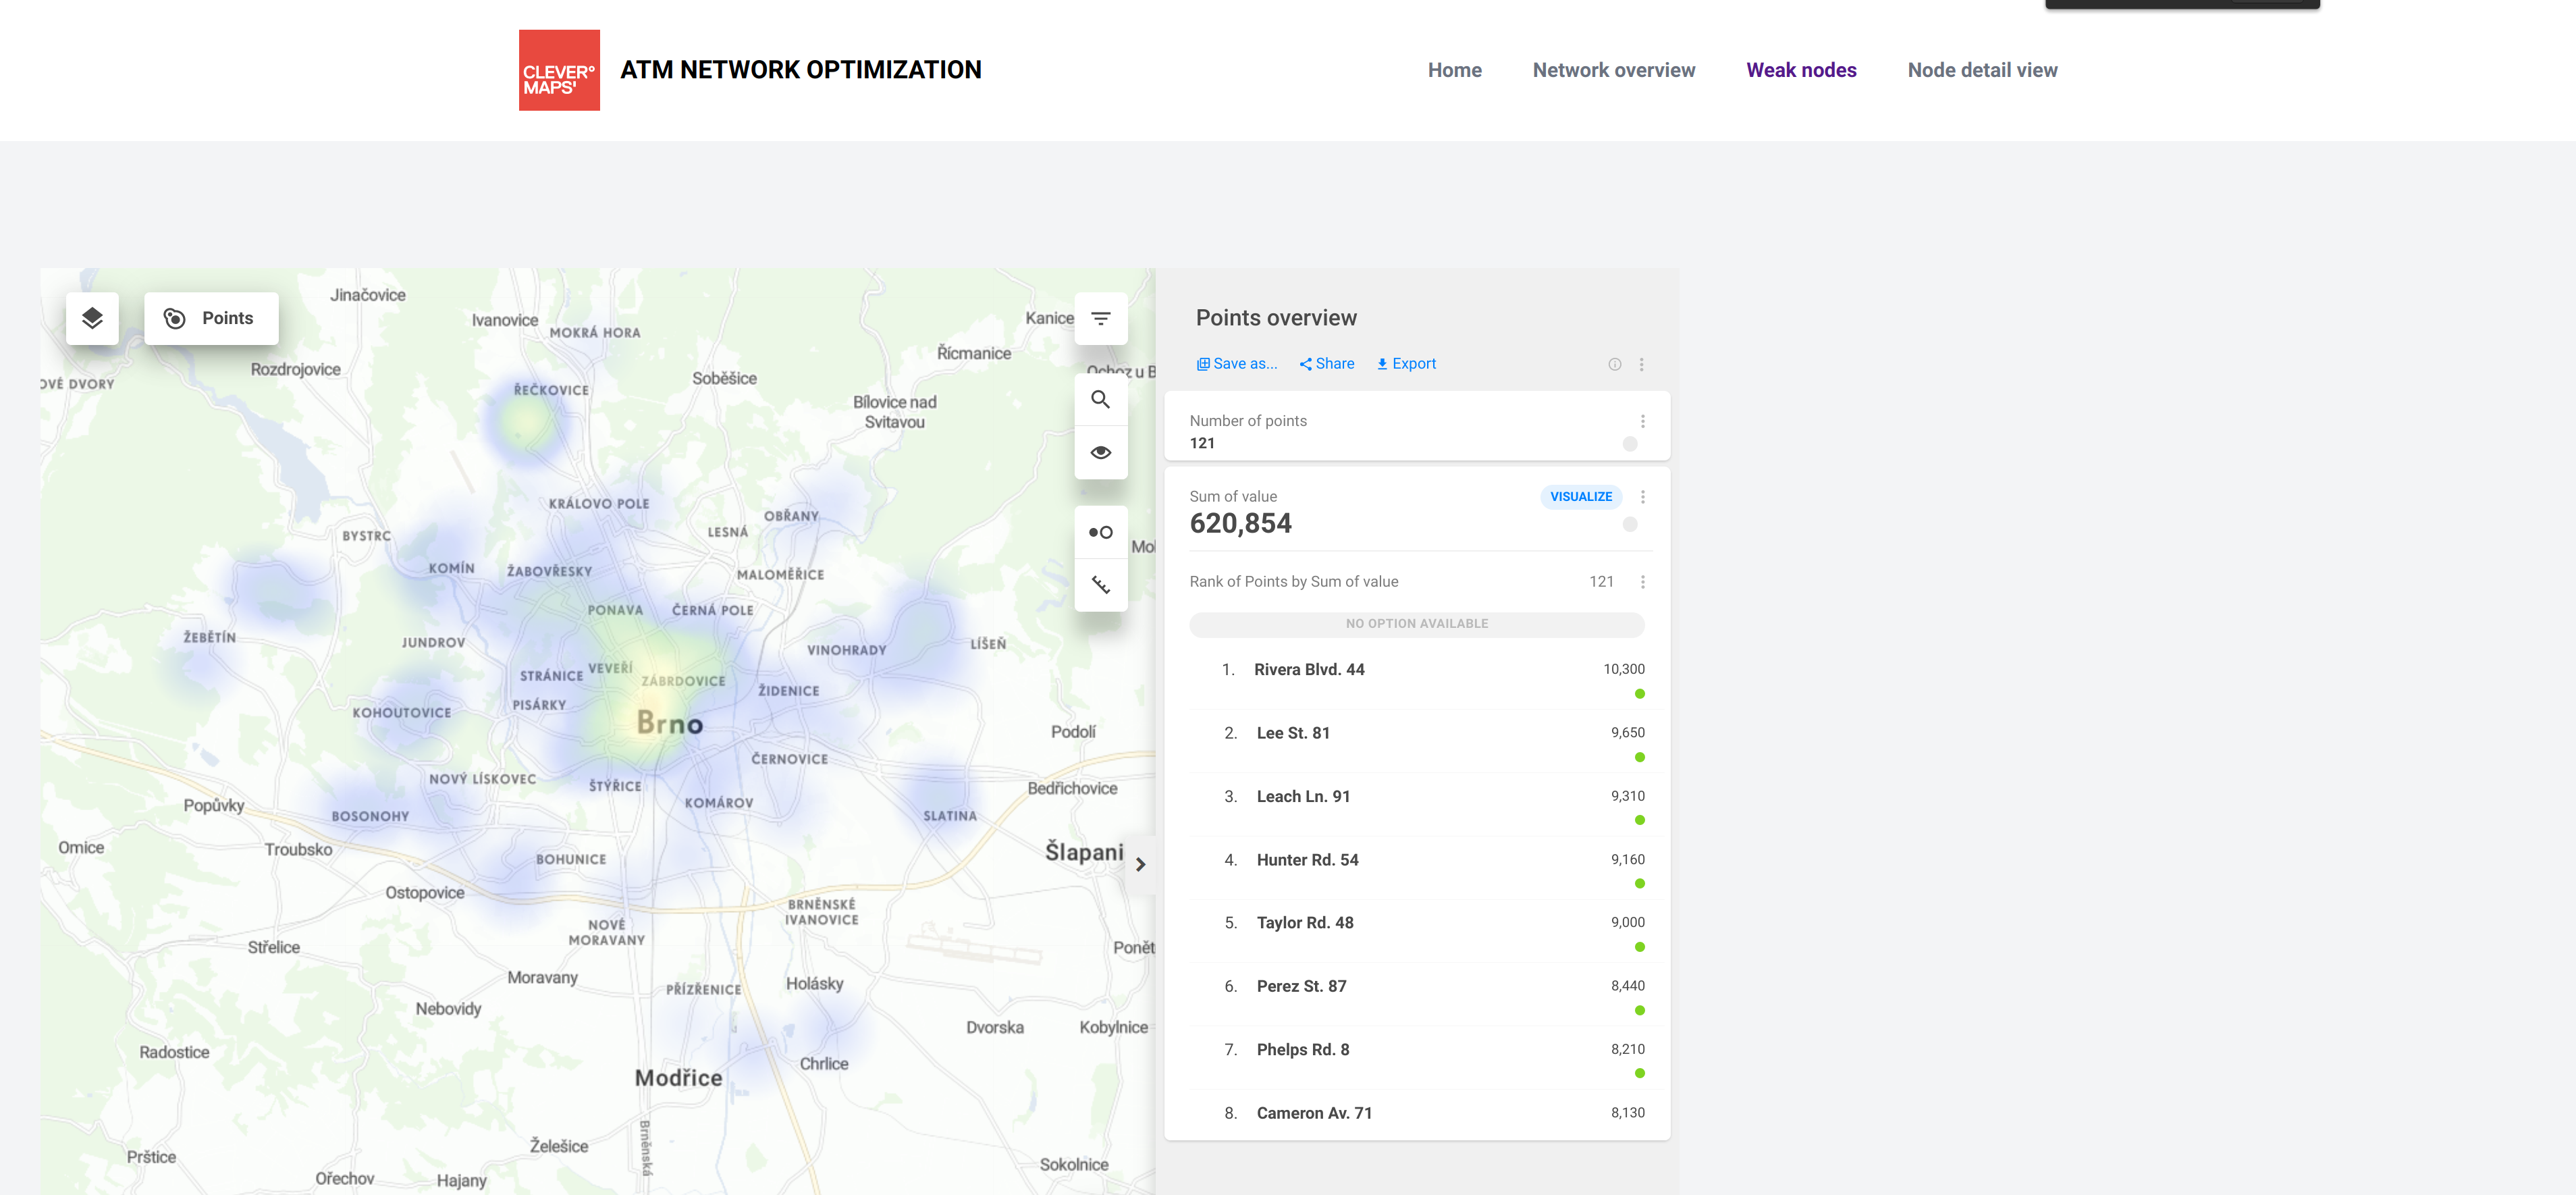
5.1. Prepare a new map dashboard
Click “Back to Story“ and “Edit chapter“ called Weak nodes. Add a new map dashboard in the same way as in the previous tutorial section with default settings.

5.2. Derive new map dashboard state
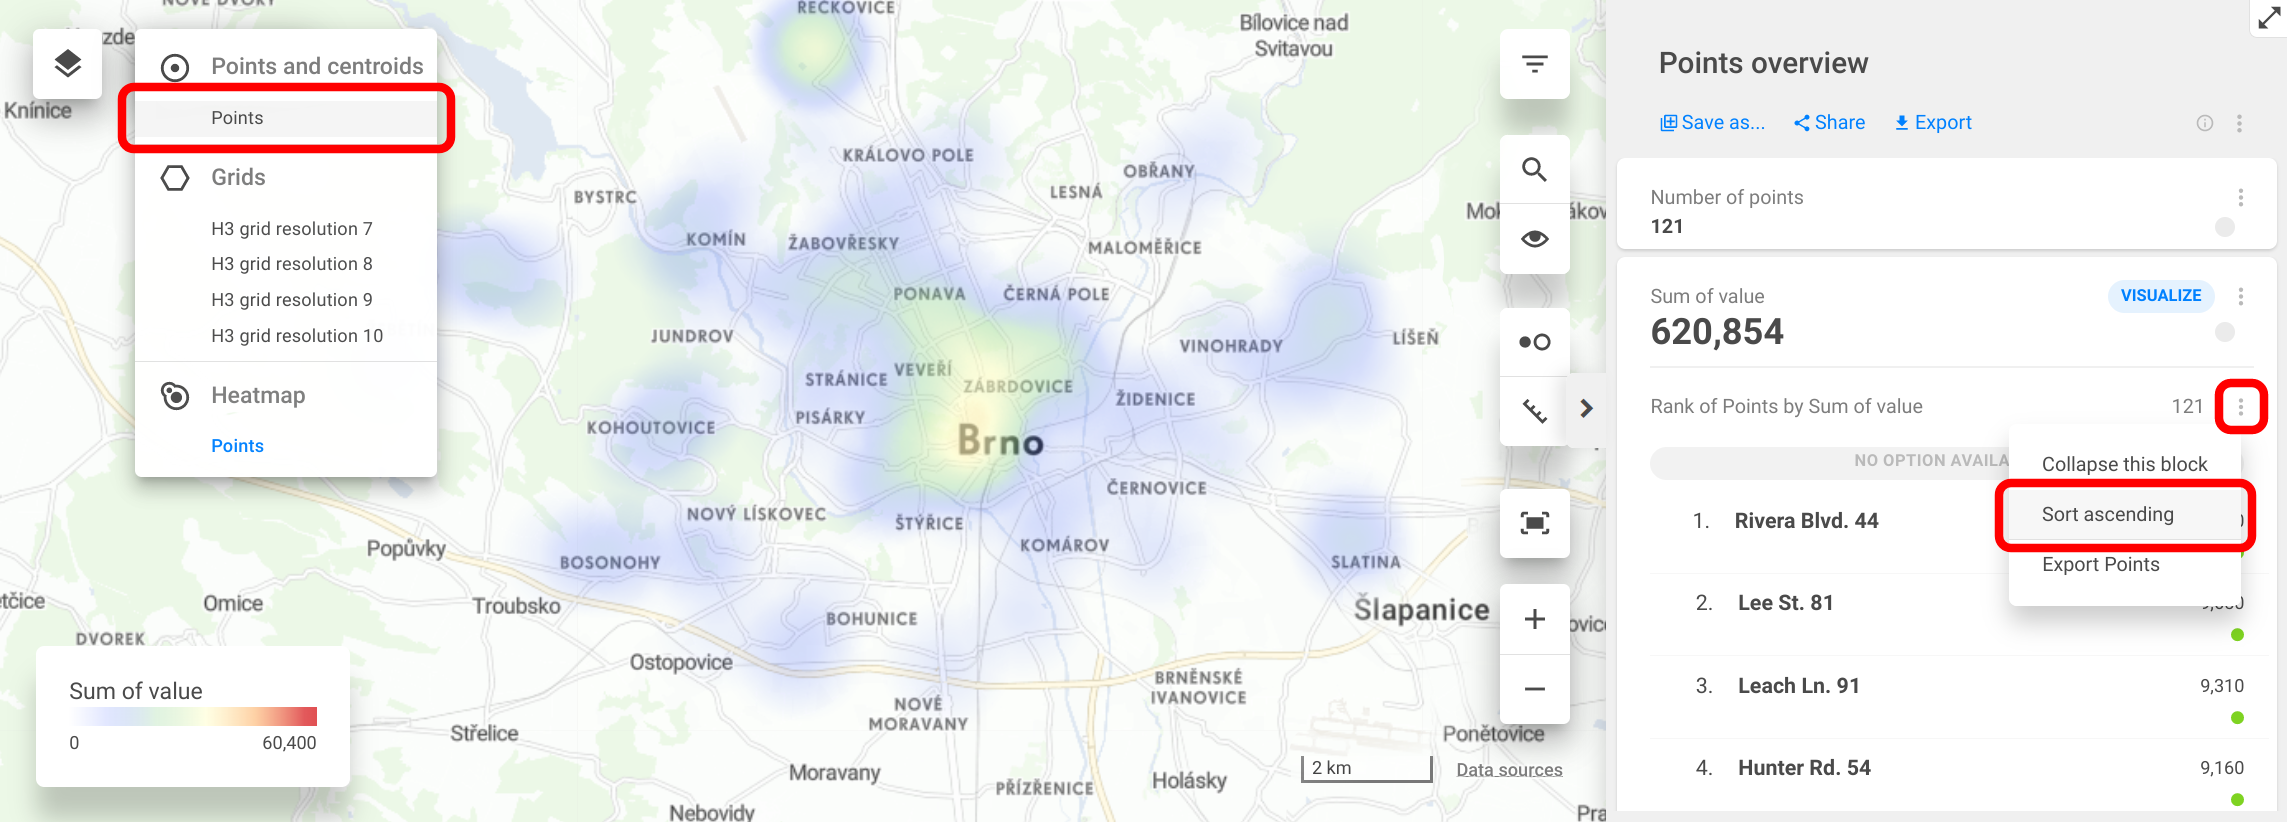
Map dashboard state (also called view state) is all settings controlled within the map dashboard UI. The state is composed of, e.g. map position, selected base map layer if the dashboard block is collapsed or ascending/descending order of ranking block. You can see the complete list of state parts in Persistable state.
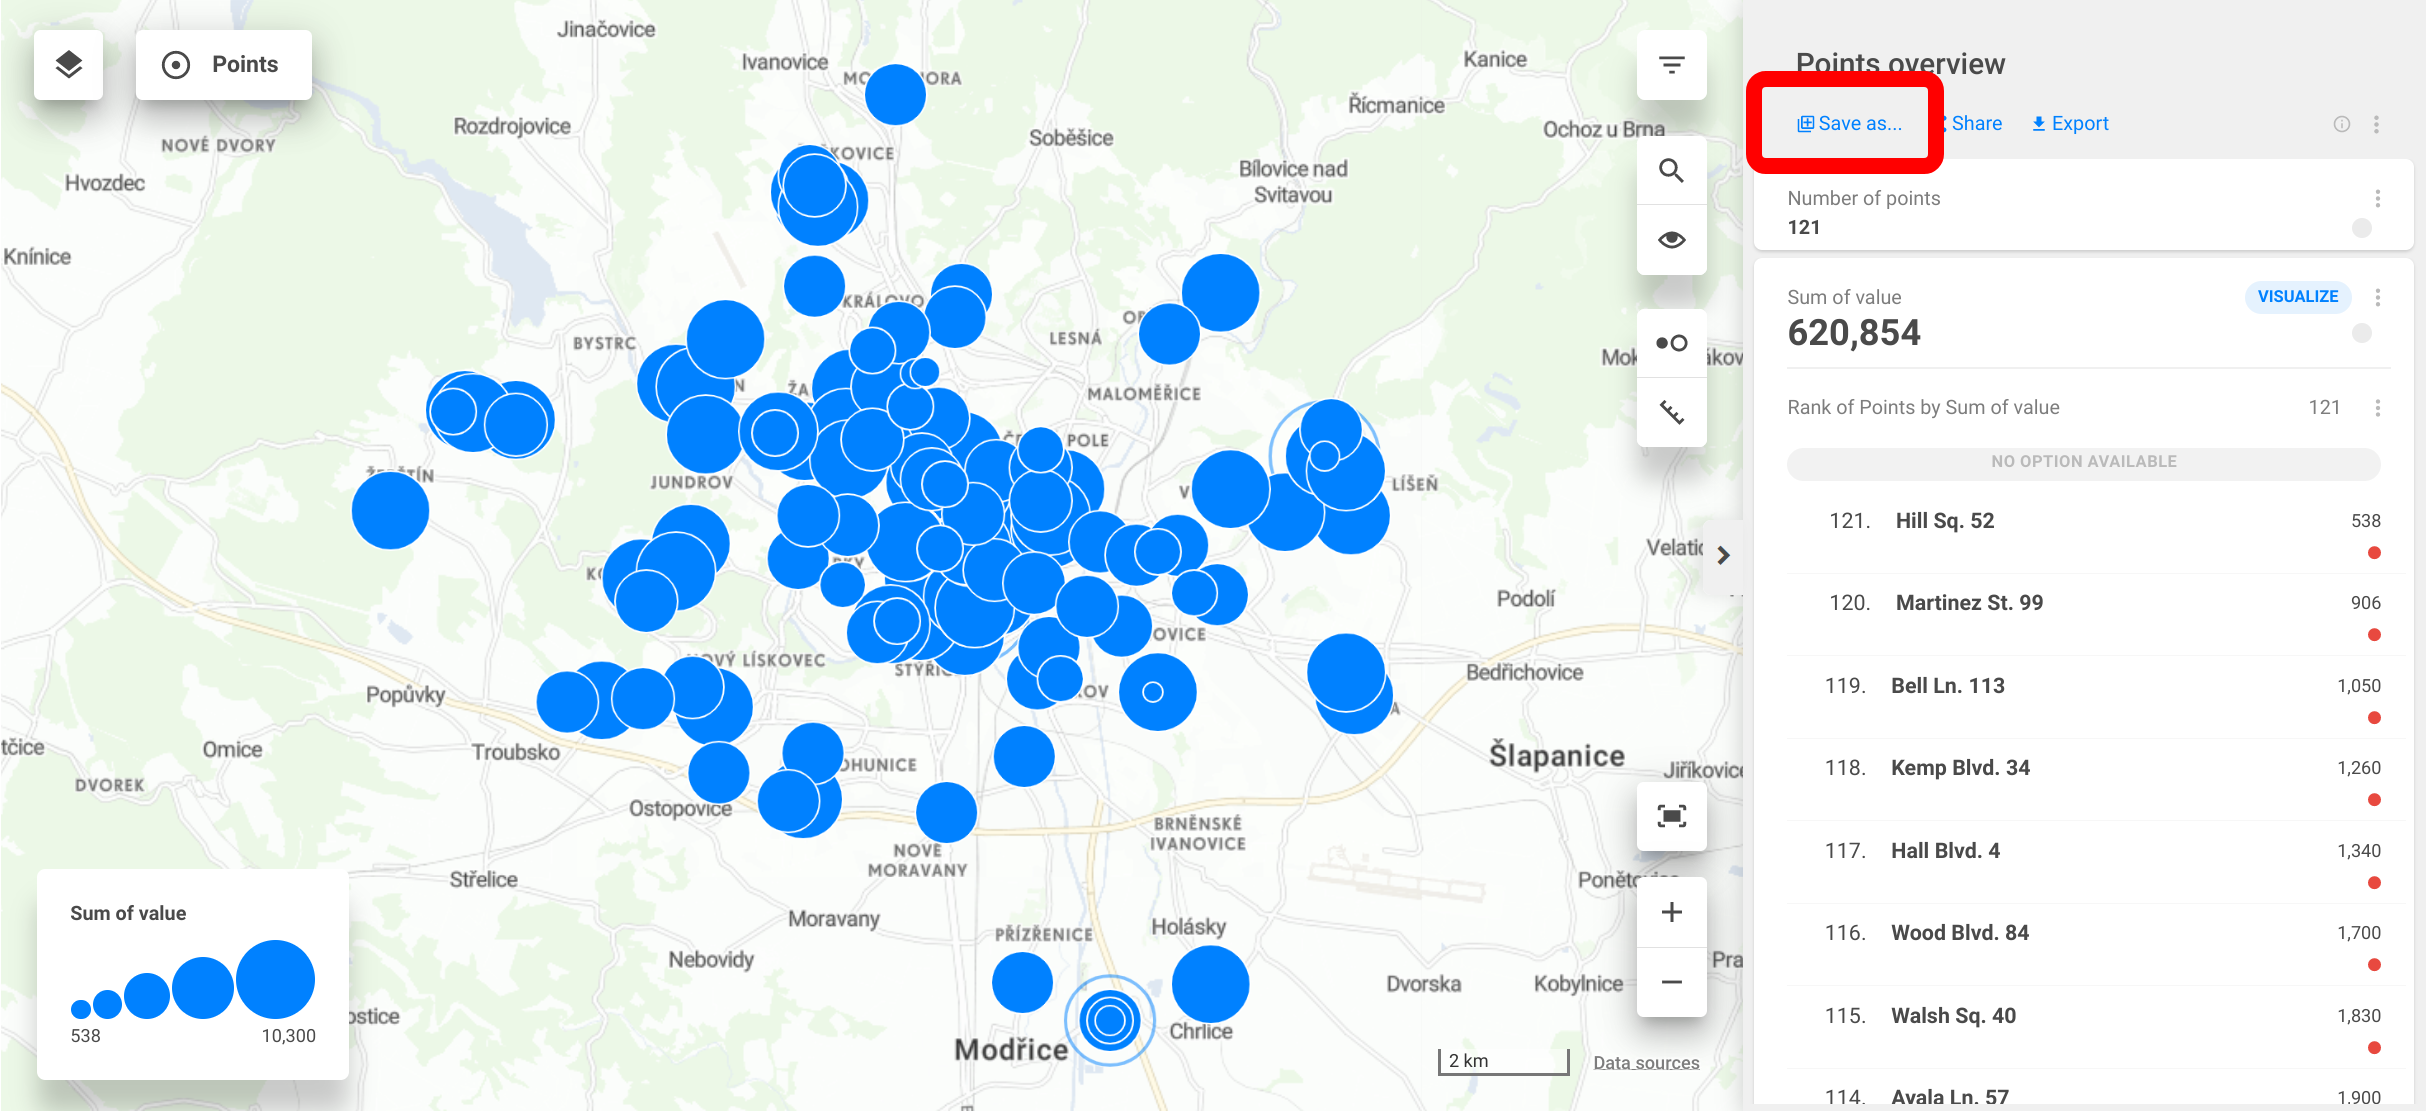
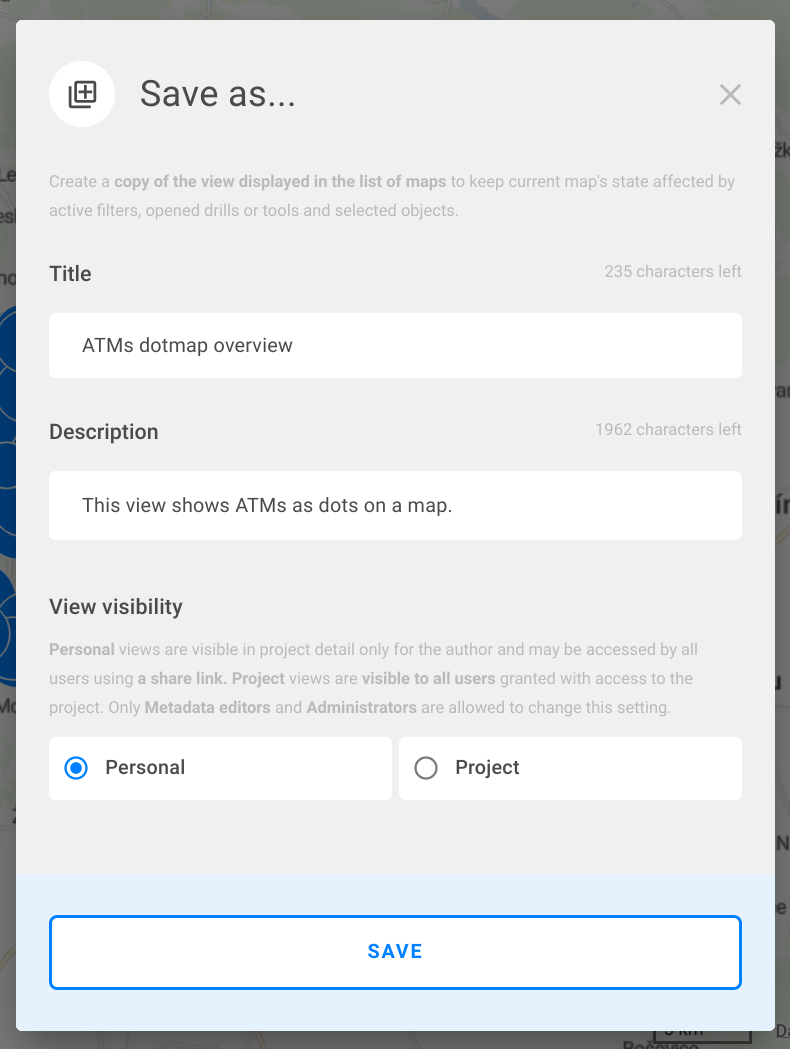
The state can be tweaked, set as a new map dashboard and then embedded in Story. First, change a desired state in the map dashboard preview to do this. Next, save the state as a new view by clicking Save in the top right corner. Fill the name of a new view with “ATMs dotmap overview“ and description as “This view shows ATMs as dots on a map“. Let view as Personal and click Save.
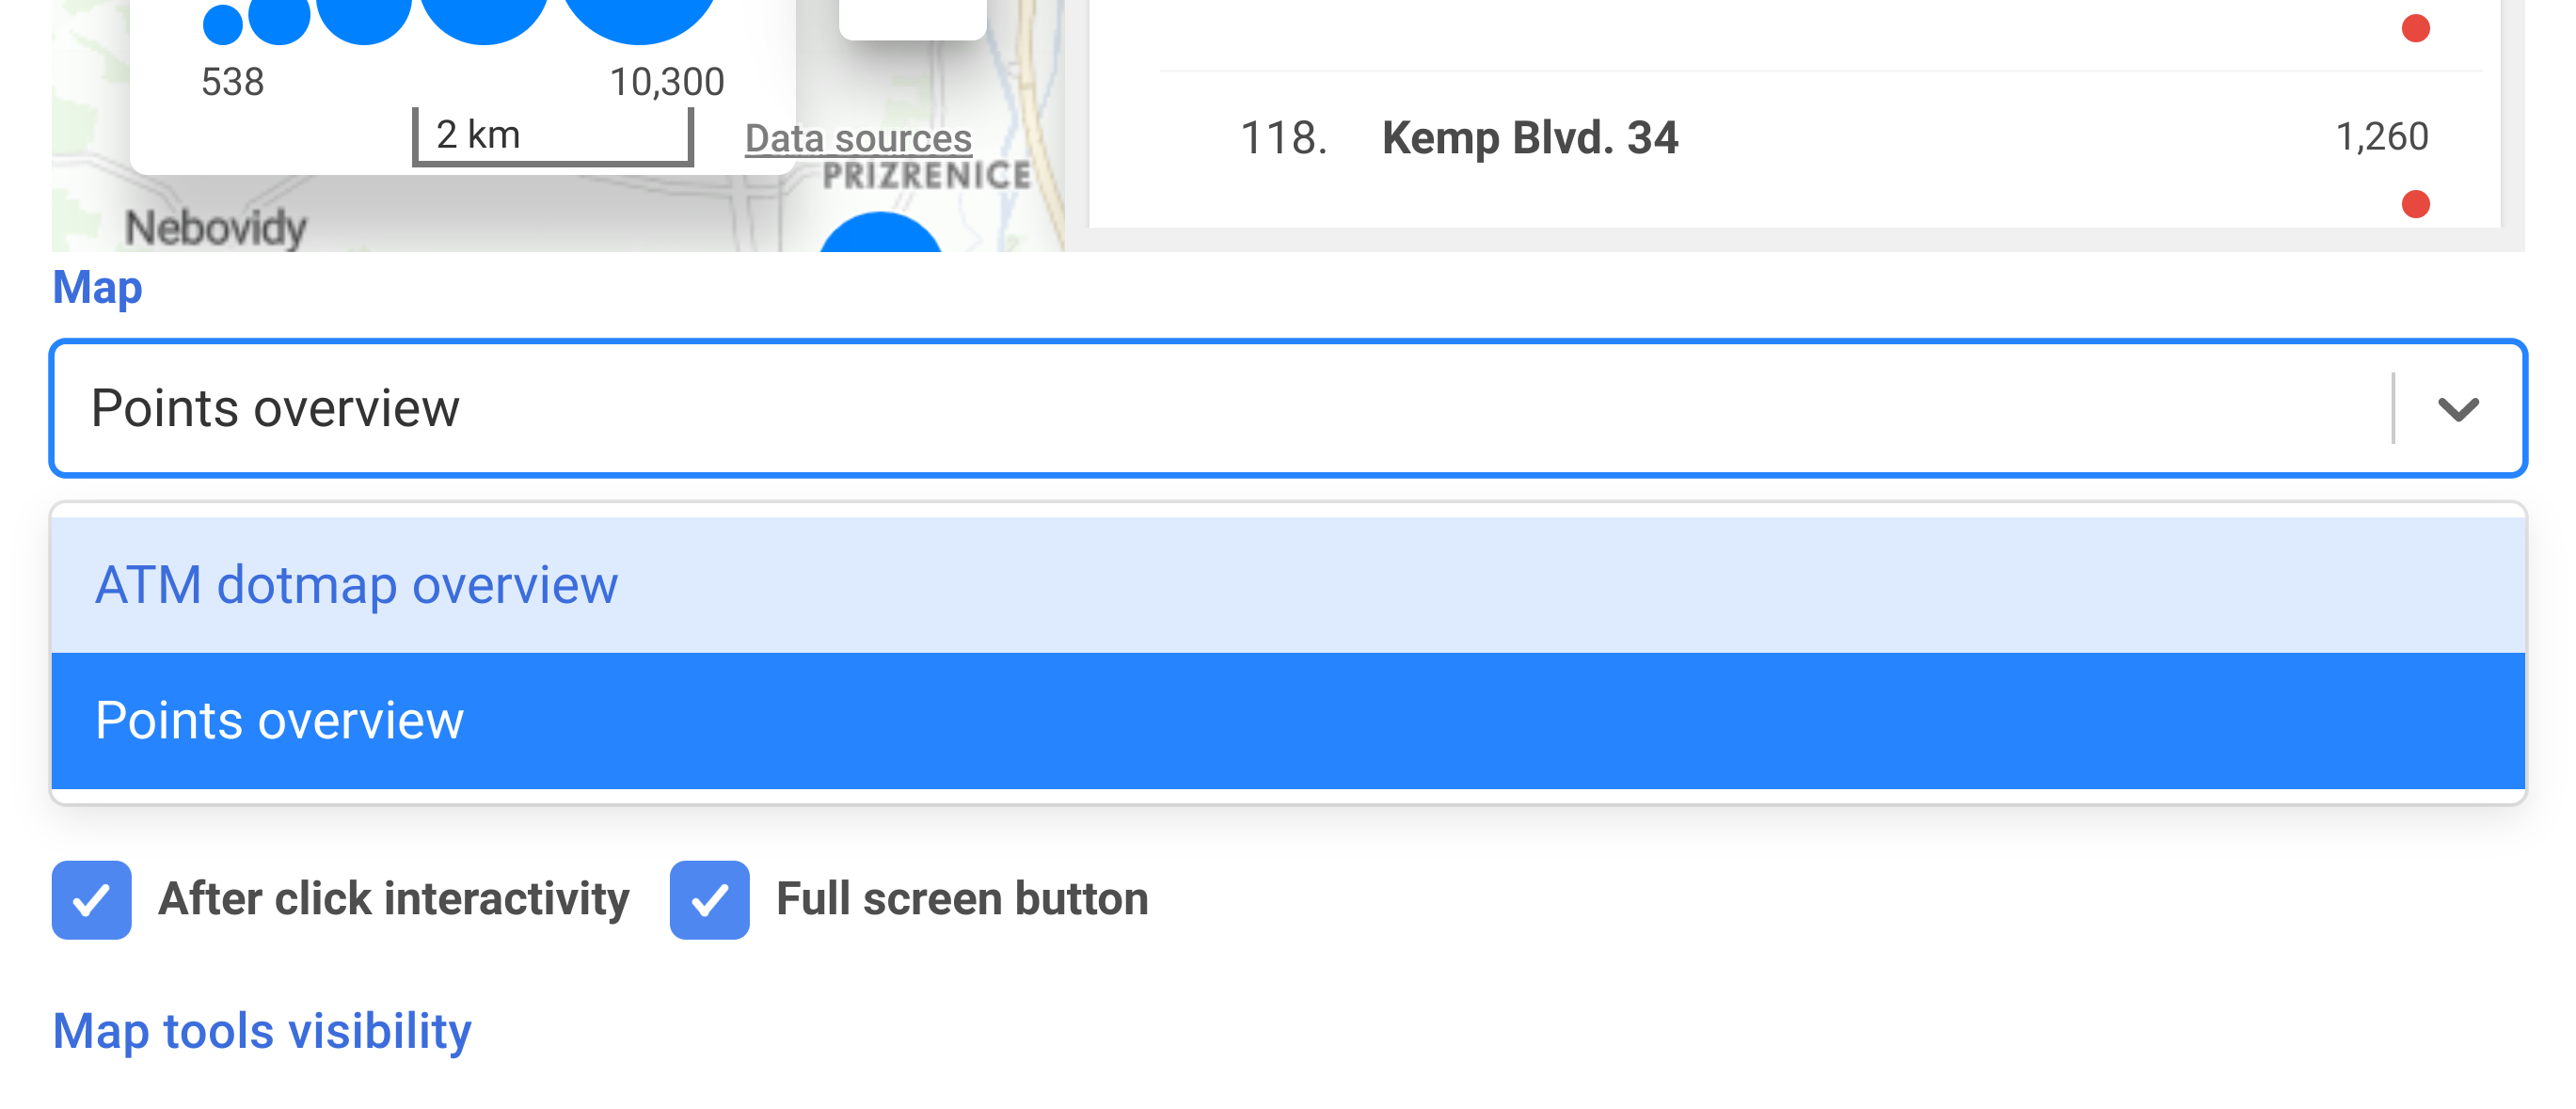
5.3. Set new state as default
Select the newly created view (map dashboard) from the map settings dropdown to embed it. Click on the arrow beside “Points overview“ and select “ATMs dotmap overview“ instead. The Story is automatically saved in this step.
There is a known bug. You need to refresh a browser page to make the newly created view appear in a dropdown. Use a dedicated browser button or press the F5 key.
Congratulation! You’ve derived a new state from the map dashboard and embedded it in a Story. Check your result by clicking the “View chapter“ button.
5.4. Derive more states
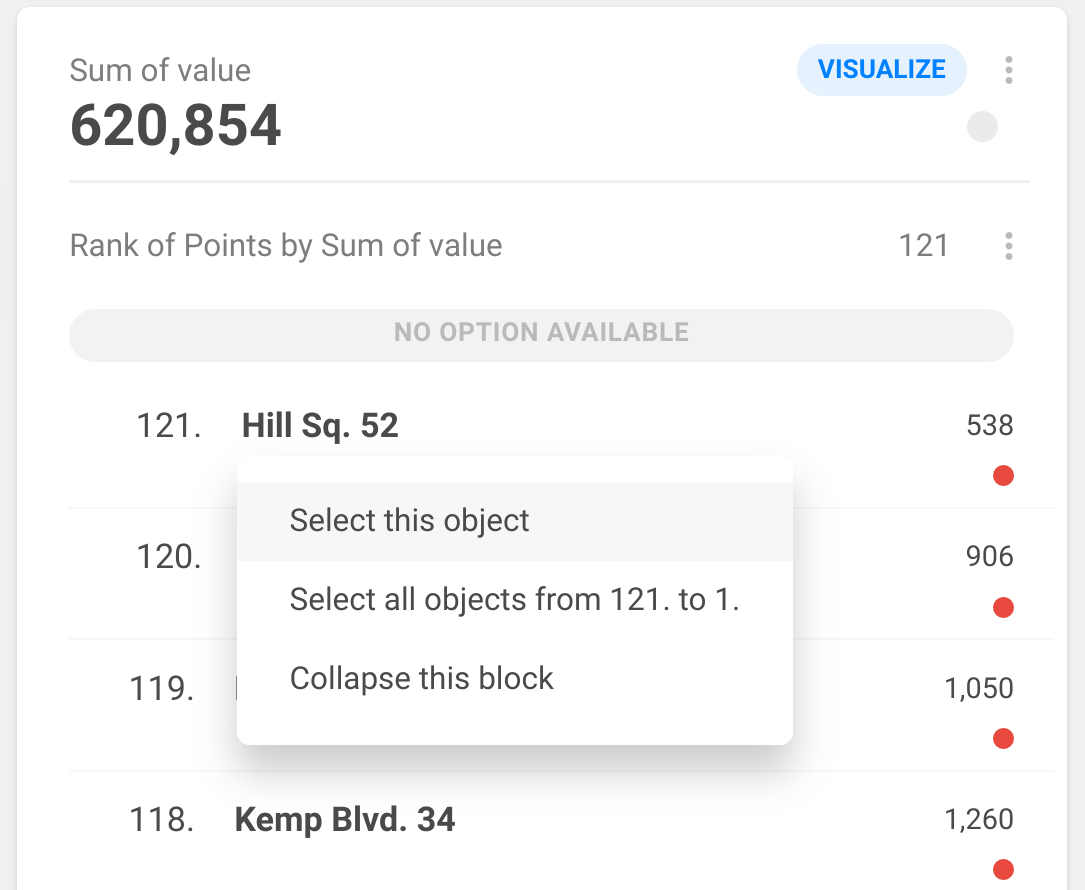
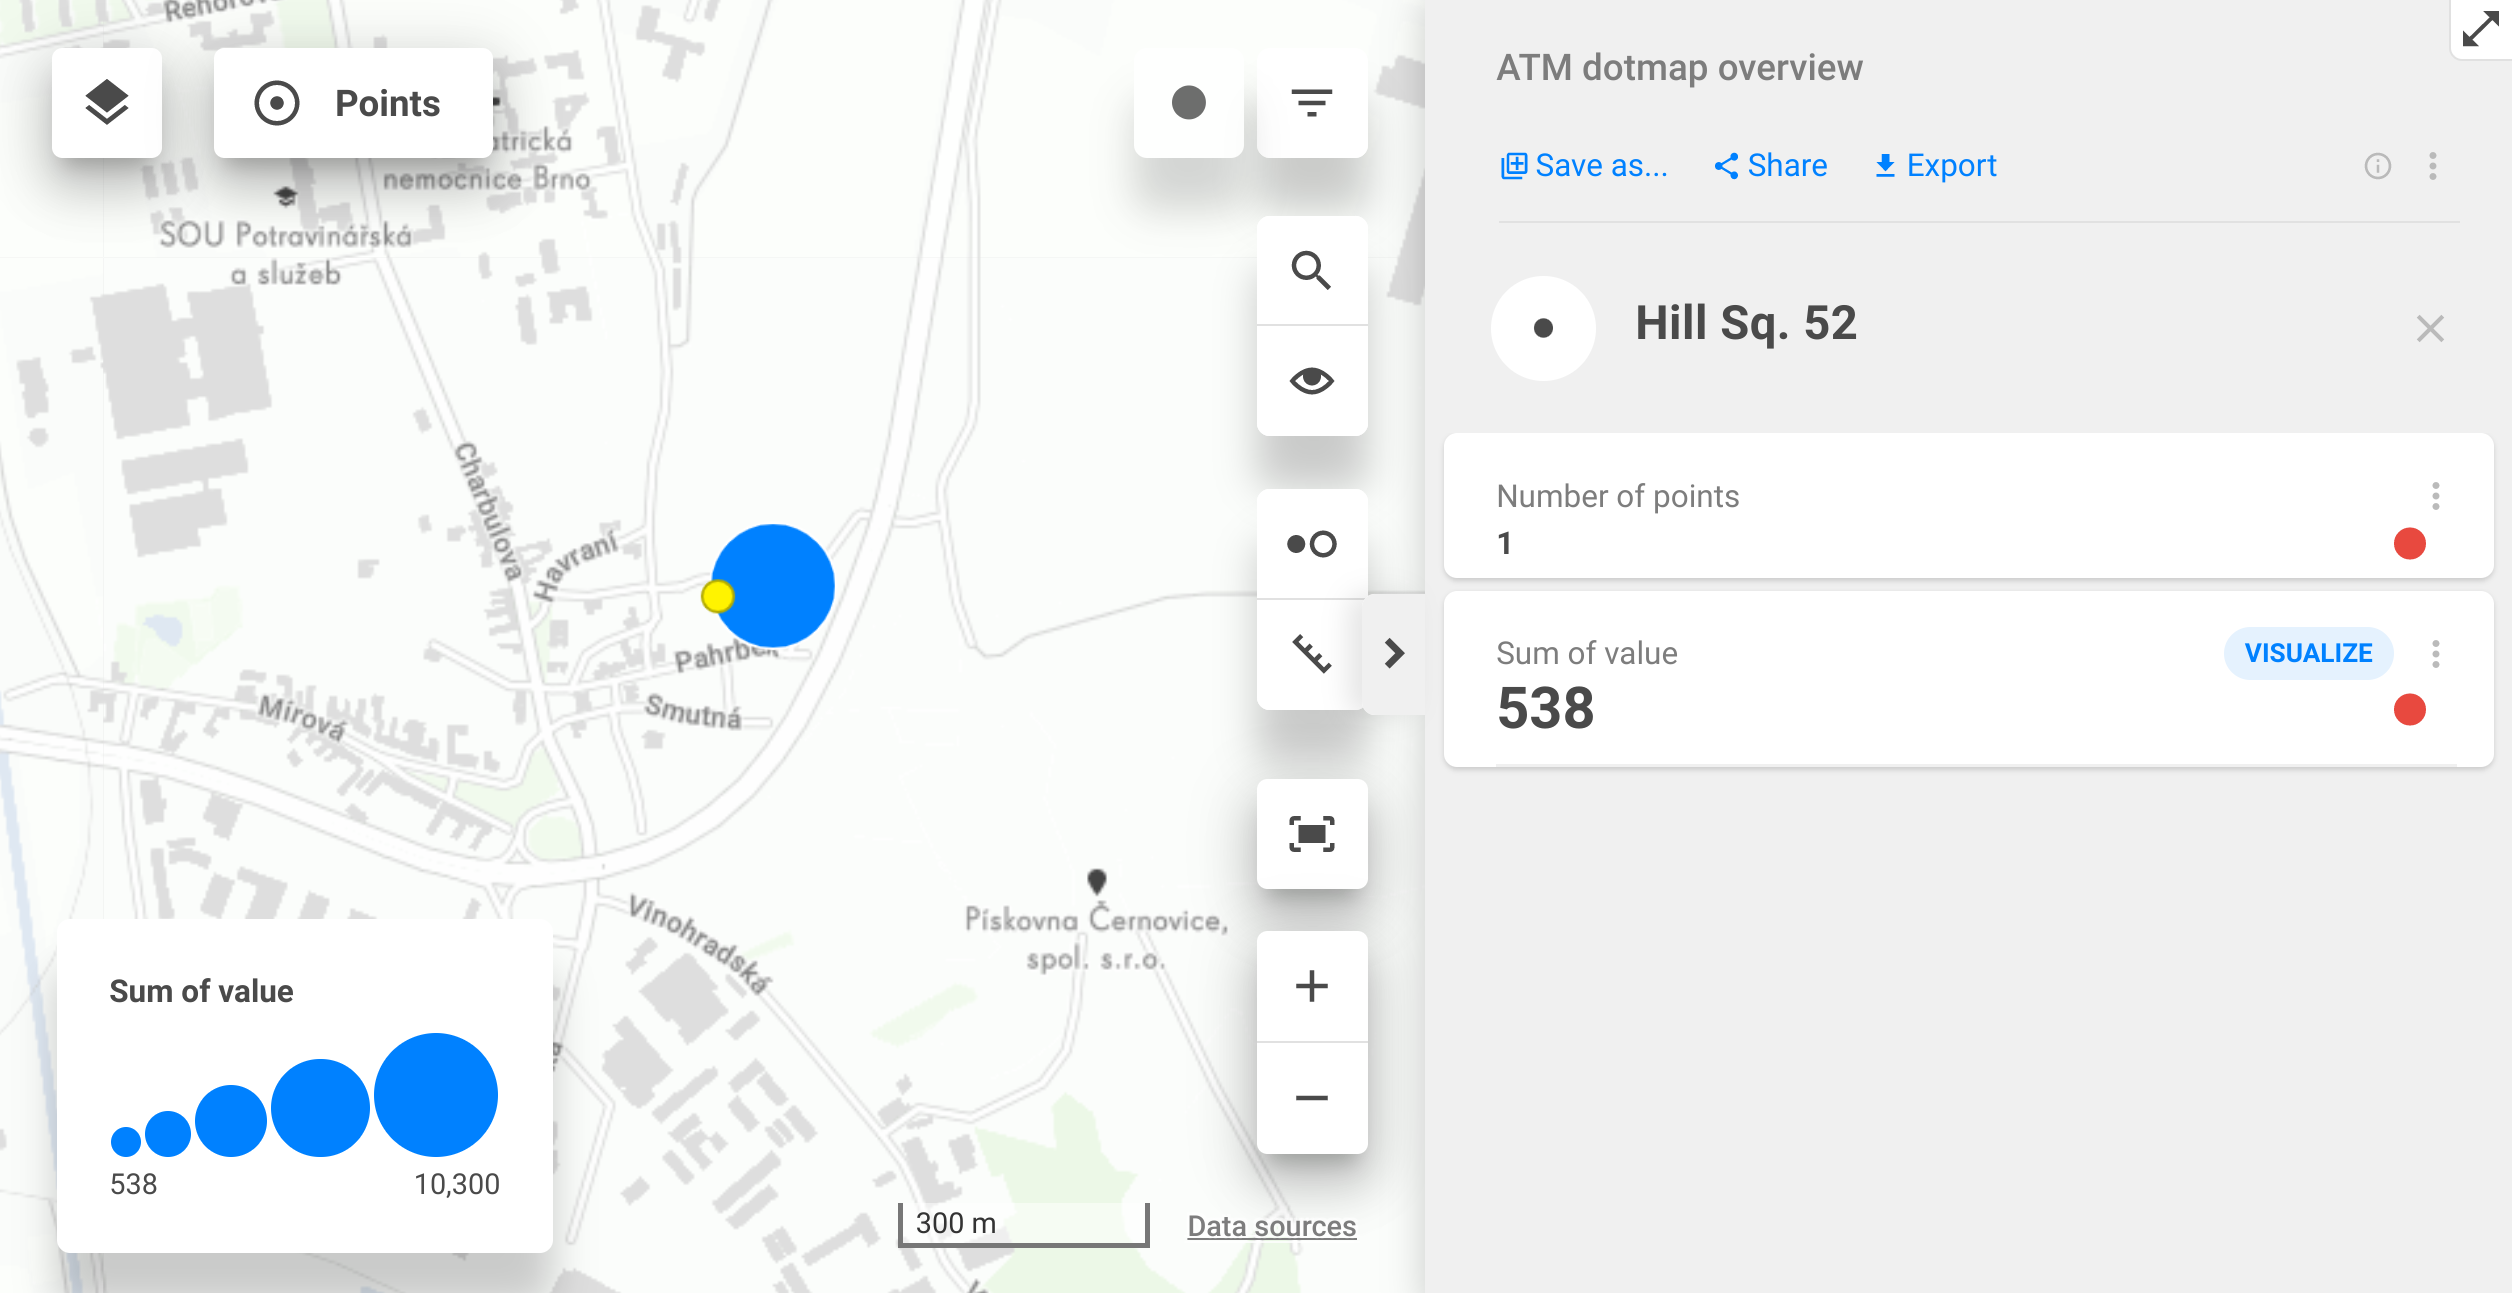
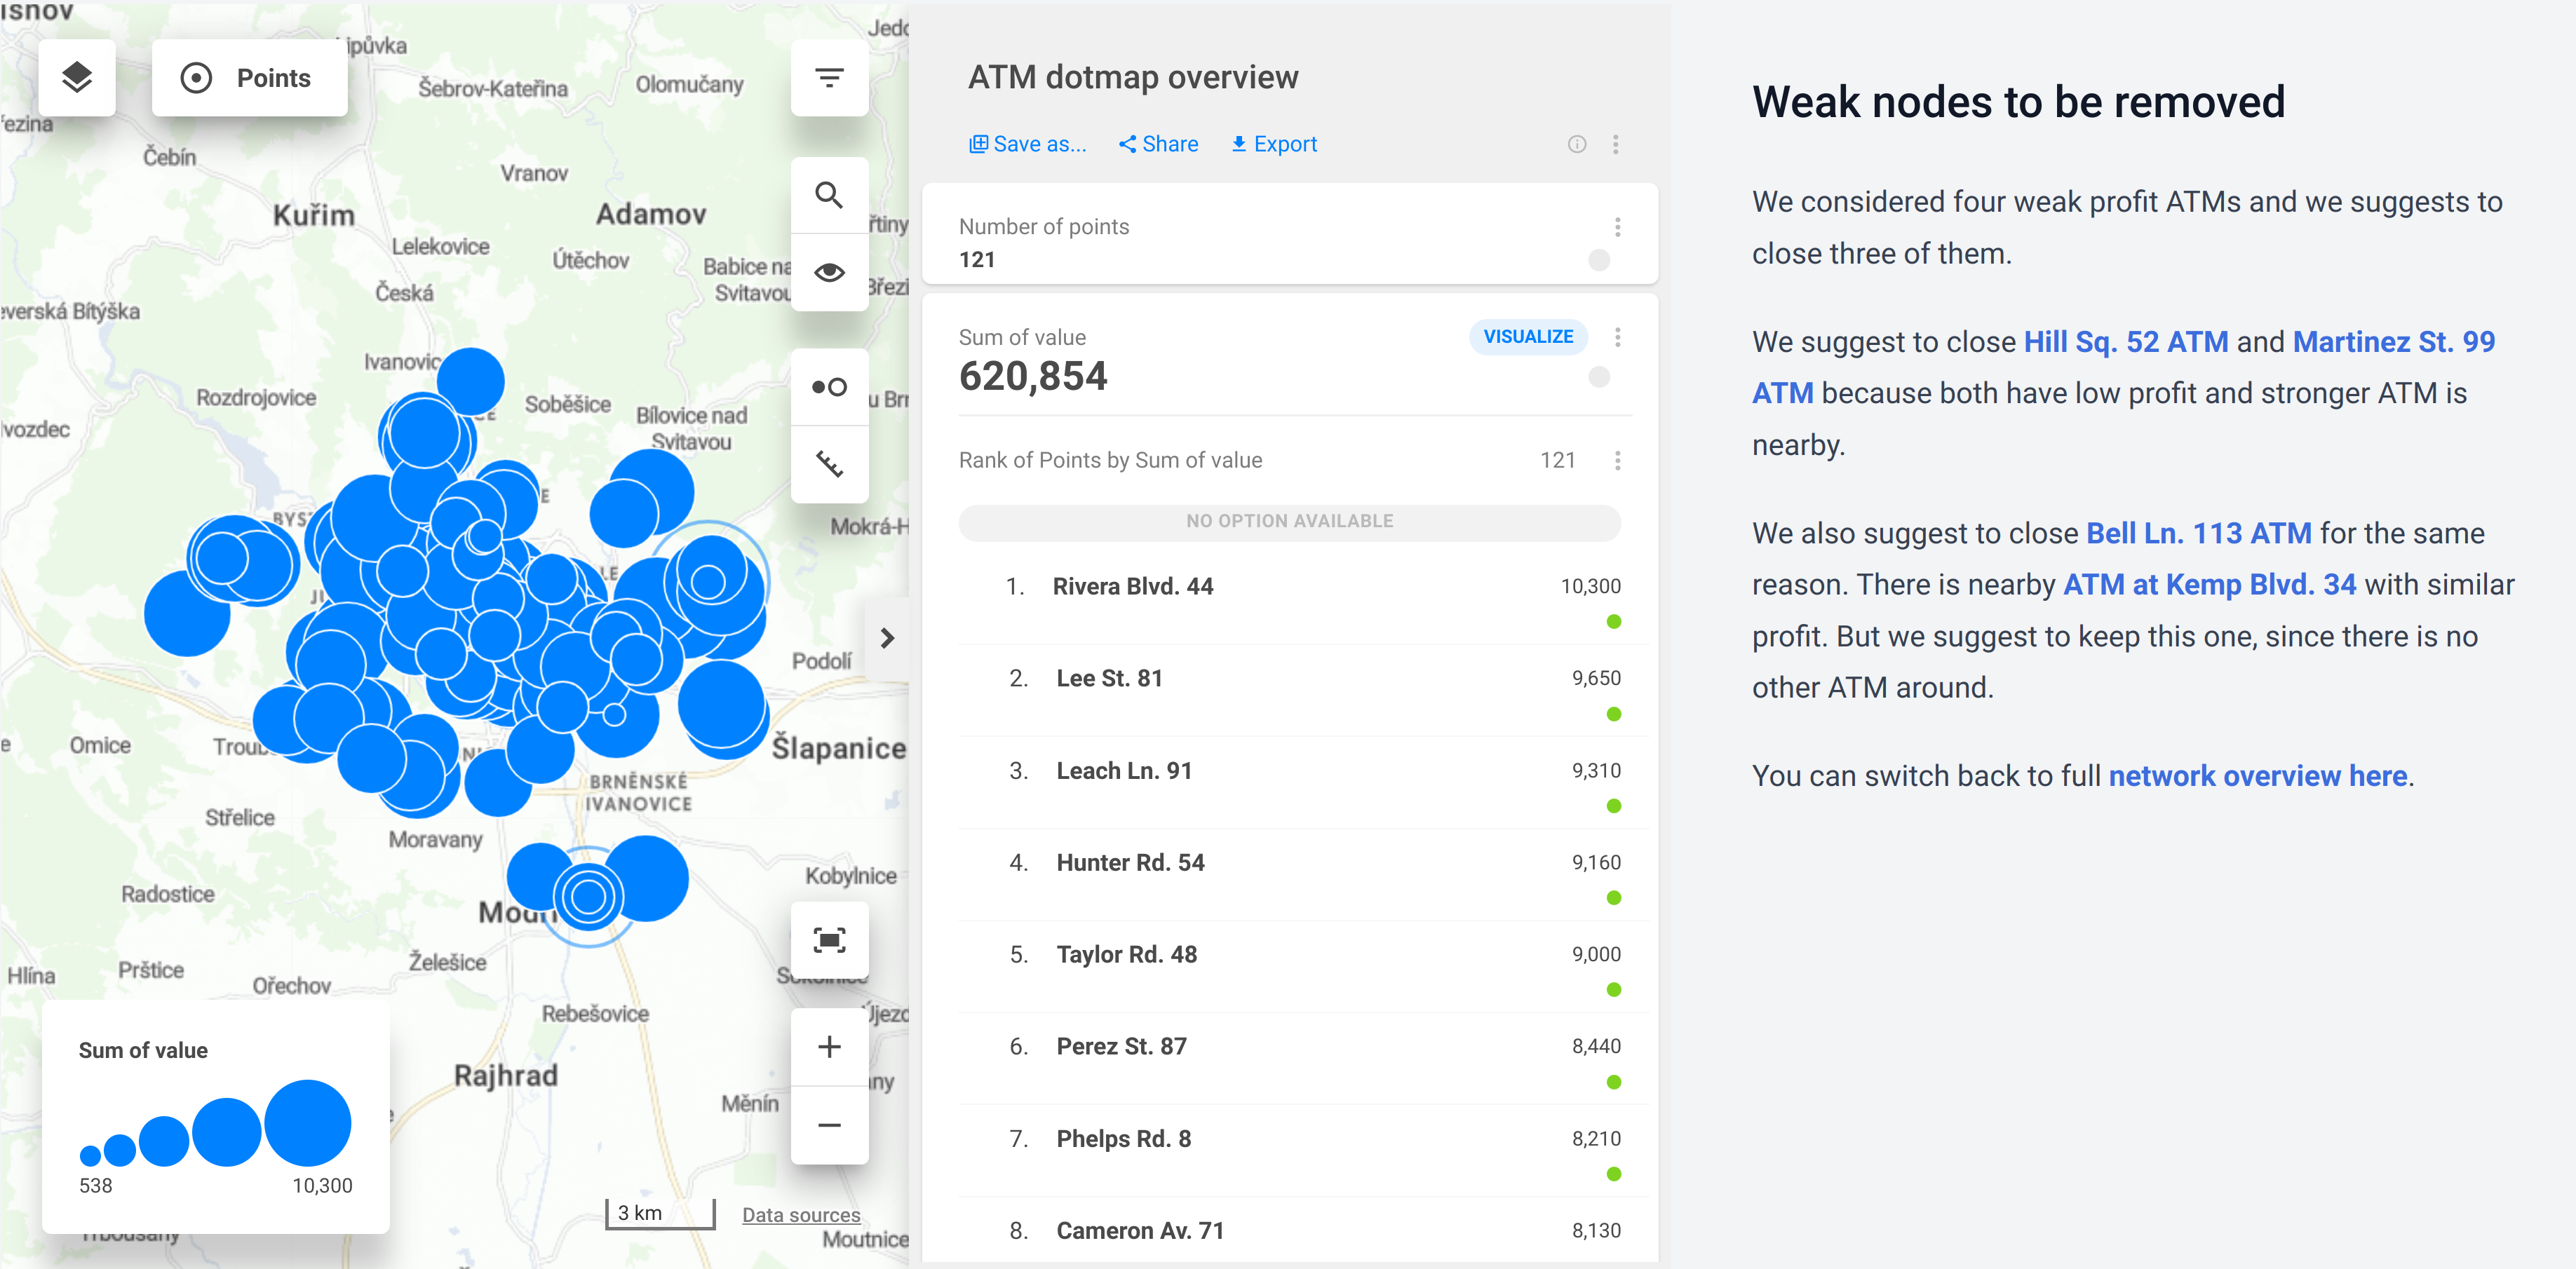
We will derive more states for the 4 least-performing ATMs. Click with the right mouse button on the least performing ATM in the ranking block with rank 121. called Hill Sq. 52. Select this ATM and Zoom map on the selected ATM.
Click “Save as …” and fill the title with “Hill Sq. 52“ and the description with “This view shows data for ATM at Hill Sq. 52“ and click Save. Stop here, do not select it as default.
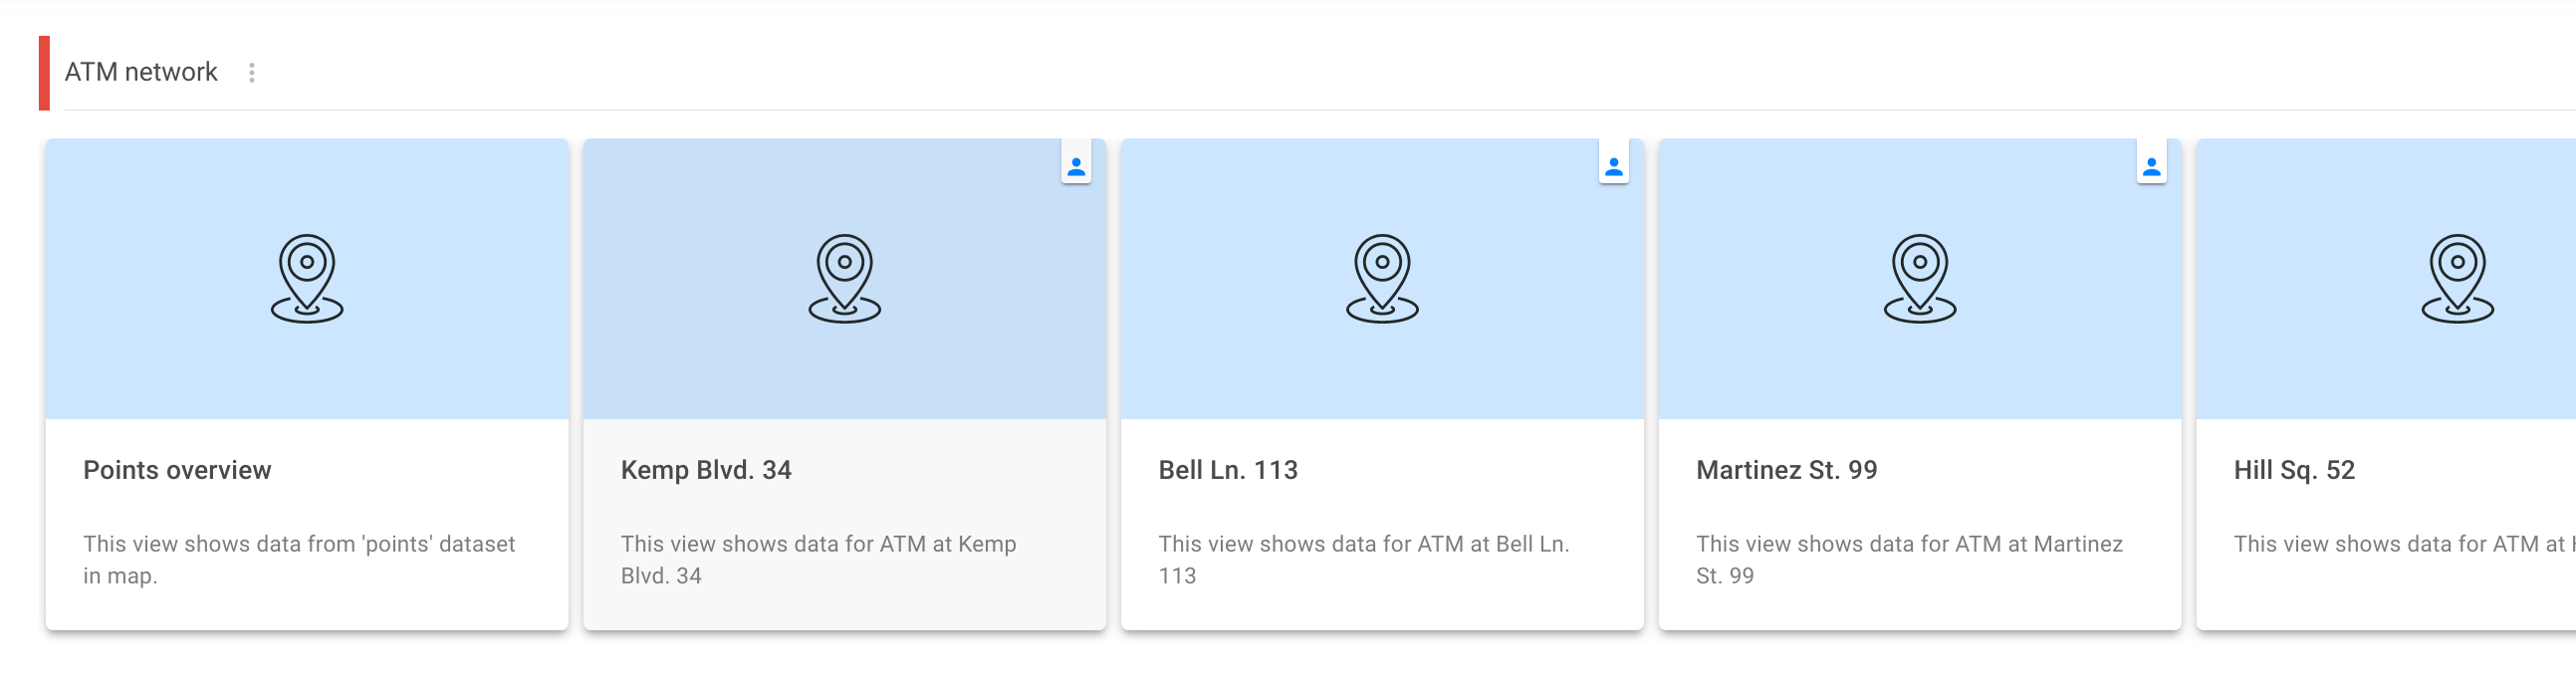
Repeat this process for the next three least-performing ATMs. You should end up with 4 new map dashboards called:
Hill Sq. 52, Martinez St. 99, Bell Ln. 113, Kemp Blvd. 34
and one from the previous step: ATMs dotmap overview
5.6. Add text for story-telling
Add the following text to map dashboard-related content (it will be placed beside the map dashboard).
|
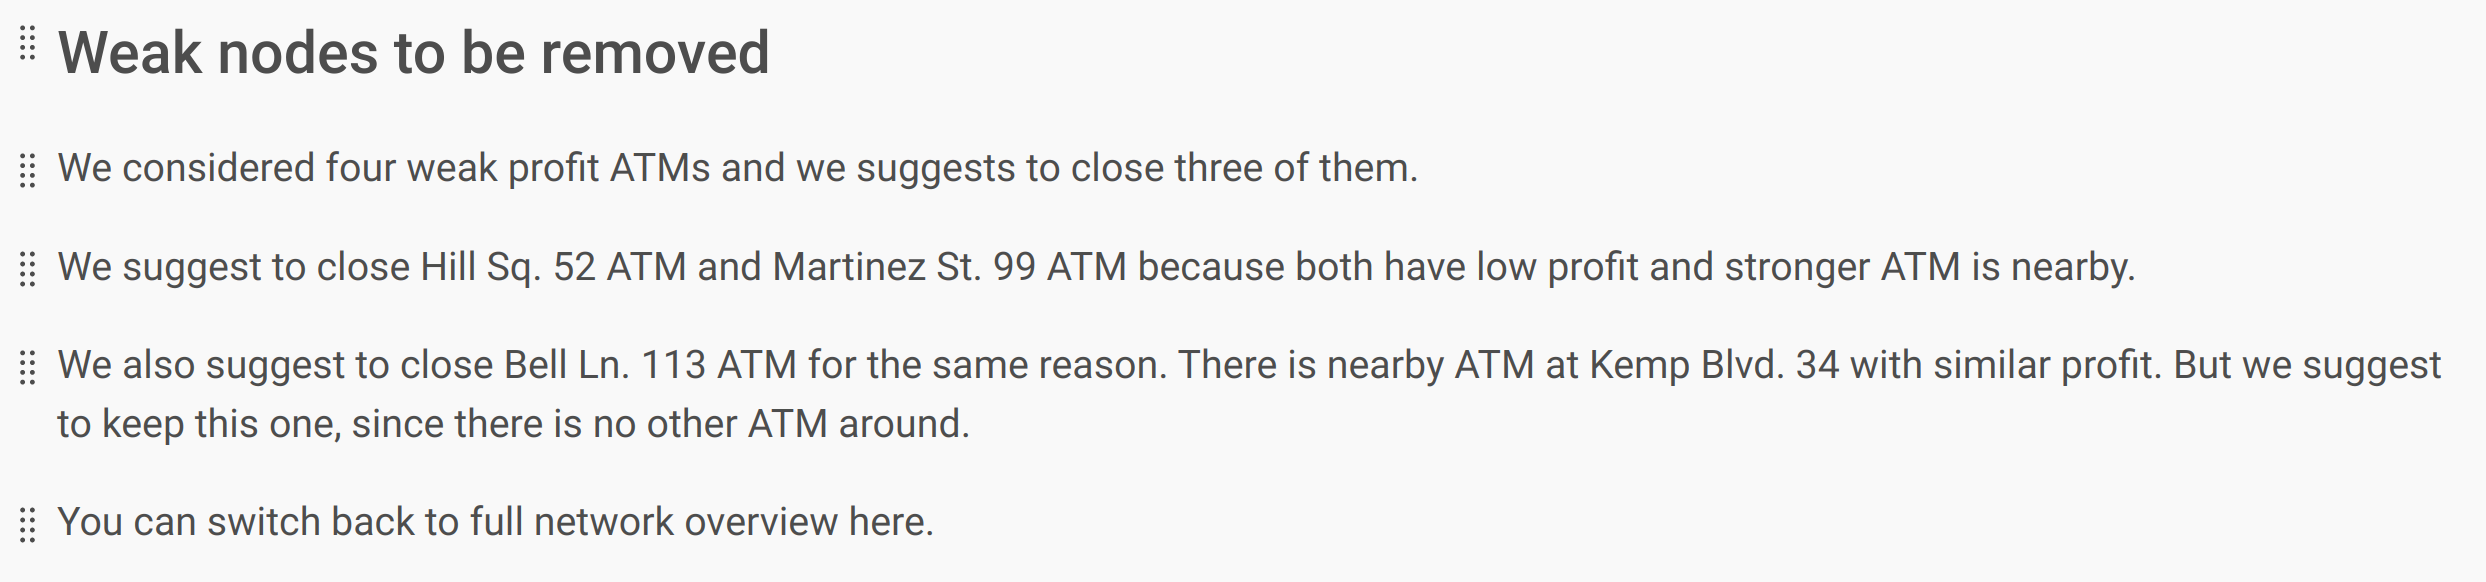
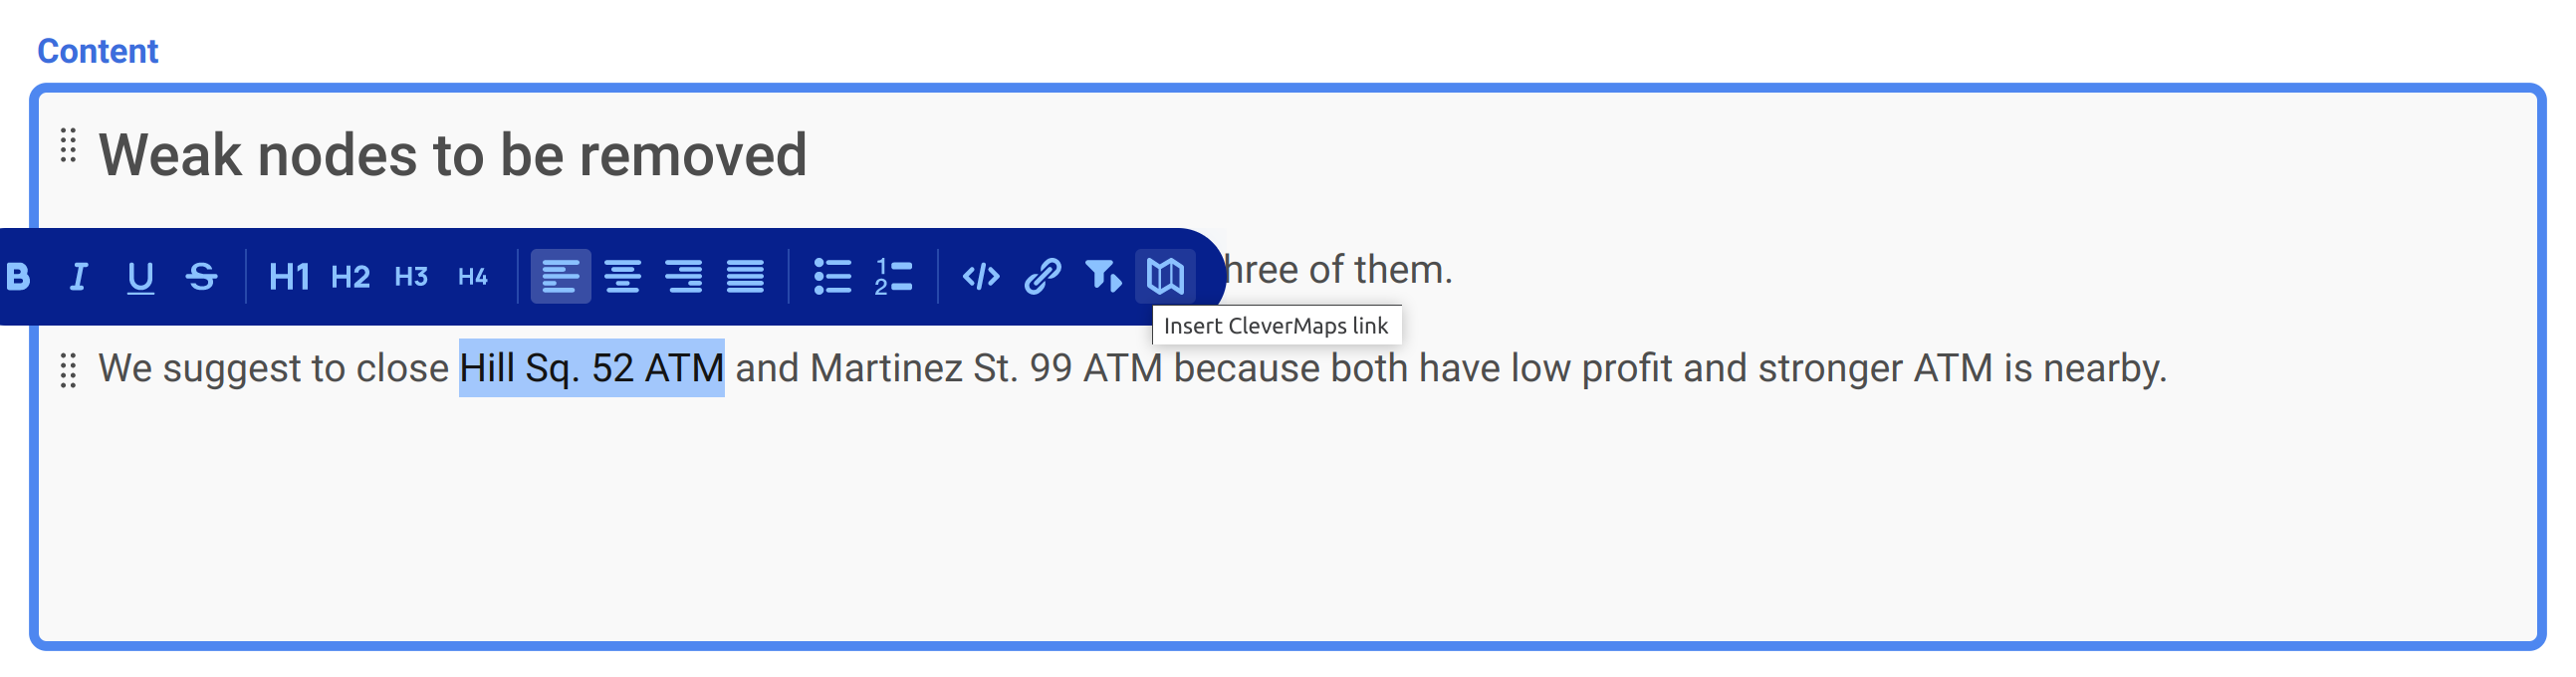
Weak nodes to be removed We considered four weak profit ATMs and suggest closing three of them. We suggest closing Hill Sq. 52 ATM and Martinez St. 99 ATM because both have low profit and stronger ATM is nearby. We also suggest closing Bell Ln. 113 ATM for the same reason. There is a nearby ATM at Kemp Blvd. 34 with similar profit. But we suggest keeping this one since there is no other ATM around. You can switch back to the complete network overview here. |
5.5. Allow the reader to change the state
Stories builder allows you to create special links which switch the state in the embedded map dashboard resp. change the map dashboard to a different one. This feature is called CleverMaps links. Those links could be used in content so you may navigate users through a series of maps interactively.
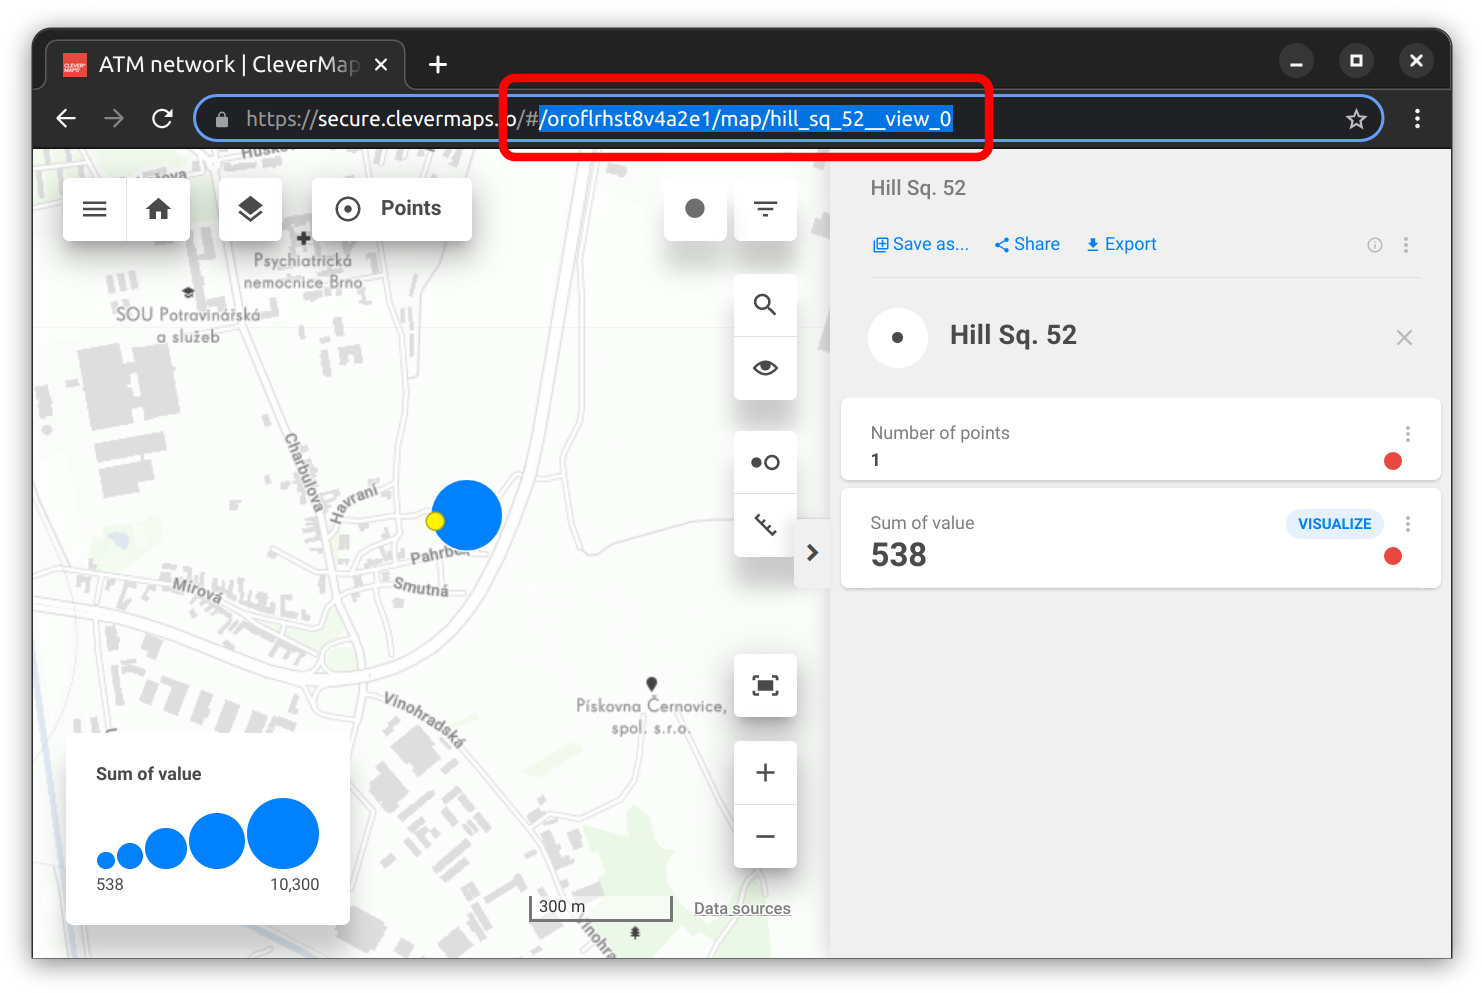
To create a CleverMaps link, you need to know the URL of newly created dashboards. This is not possible to do within Stories for now. Open CleverMaps Studio. You will see your created map dashboards (views). Select “Hill Sq. 52“. It opens your previously created view. Copy part of the URL which follows a hash symbol from the browser address bar (see screenshot beside).
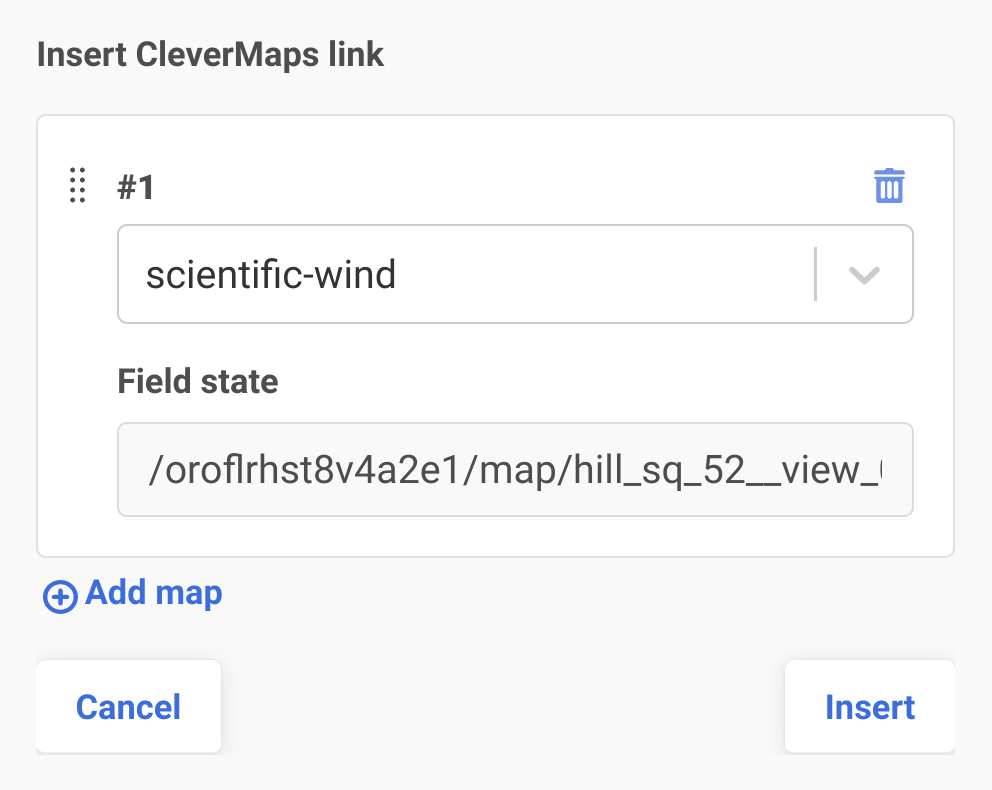
Return to Stories builder and select “Hill Sq. 52 ATM“ from the story-telling text. A blue menu will appear. Click the button with a folded map icon. A modal dialogue will show up. One link can control multiple embedded maps. Click the “Add map“ button. Select your generated embedded map name. Note that in the screenshot beside, you see scientific-wind, but yours will differ. Paste copied part of the URL to the state field and click Insert.
Click “Save“ and “View chapter“. You should see the same as captured in the screenshot beside. Try to click the “Hill Sq. 52 ATM“ link. The map dashboard reloads and shows detail of the ATM.
Congratulation! You’ve just learned how to change the map dashboard state. Now you can do the same for the rest of the saved states.
Martinez St. 99, Bell Ln. 113, Kemp Blvd. 34, ATMs dotmap overview
Back to 4. Include Map dashboards
Continue to 6. Filter Map dashbords