Introduction
-
This document is dedicated for CleverMaps implementators. It describes a setup of the solution which allows CleverMaps users to make some basic edits in the dataset (e.g. dataset of shops) stored in CleverMaps data warehouse.
-
The main idea is that a copy of a CleverMaps dataset is shared via Google Sheet where the user can make some basic edits and then these edits are automatically loaded into the CleverMaps platform using Keboola. We believe that for most of the cases Keboola Free Plan should be enough.
-
This scenario is suitable for smaller tables (up to tens of thousands rows)
-
This scenario allows to set the the synchronization of edits on schedule or on-demand
Things to keep in mind
-
Google Sheet is limited by default to 5 milions of cells, but for convenient work we advice to have tens of thousands of rows at maximum
-
Keboola free project has 300 minutes of free processing per month, after that you (or your customer) will be charged with 14 cents for each minute (https://www.keboola.com/pricing ). But we believe that for most of the cases (considering some edits once or twice per week) this should be enough.
Steps overview
-
Google Sheet
-
Setting up a shared Google Sheet
-
Keboola Google Sheet extension (optional)
-
-
Keboola project
-
Setting up a free Keboola project
-
Google Drive Extractor setup
-
CleverMaps Writer setup
-
Transformations (optional)
-
Orchestration setup
-
Google Sheet
Setting up a shared Google Sheet
-
Create a new Google Sheet in your account
-
Load your CleverMaps dataset CSV file into the Sheet. For example if we have a dataset “shops_dwh” in CleverMaps, then we need the source file “shops_dwh.csv” to be loaded into the Sheet.
-
Share the Sheet with your CleverMaps user via Share button and email.
Keboola Google Sheet extension (optional)
-
Only needed in case of on-demand data synchronization (that means if you need to load data from Sheet to CleverMaps immediately)
-
https://www.keboola.com/blog/google-sheets-data-synced-into-your-database
Keboola project
Keboola is a cloud platform for data pipelining. In our case it will be responsible for extracting the data from Google Sheet and transfering it into the CleverMaps platform. Keboola also provides powerful tools for data transformation and other calculations if needed.
We will create a new free Keboola project, then we will setup a Google Drive Extractor for getting the data from our shared Google Sheet, then we will setup a CleverMaps Writer for loading the data from Google Sheet into the CleverMaps platform. Finally we need to create an Orchestration which will glue our extractor and writer together and we will also setup a schedule of the orchestration.
Setting up a free Keboola project
-
Go to the https://www.keboola.com/ , click “Start a free project” and follow the wizard
-
Click on the link Dashboard in the “Go to see the full Dashboard” on the bottom of the page
-
Now you should see the main Dashboard. Your free Keboola project was successfully created and now you can setup your data pipeline.
Google Drive Extractor setup
-
Google Drive Extractor is standard component of the Keboola which will automatically extract data from your shared Google Sheet.
-
Follow the instructions here https://help.keboola.com/components/extractors/storage/google-drive/ to setup a Google Drive Extractor.
Transformations (optional)
-
If you need to do some transformations or enhancements of the input table, you can do it with standard Keboola Transformations https://help.keboola.com/transformations/ or you can use some of our Keboola CleverMaps components (AreaMapper, SpatialUtils, …) for spatial calculations.
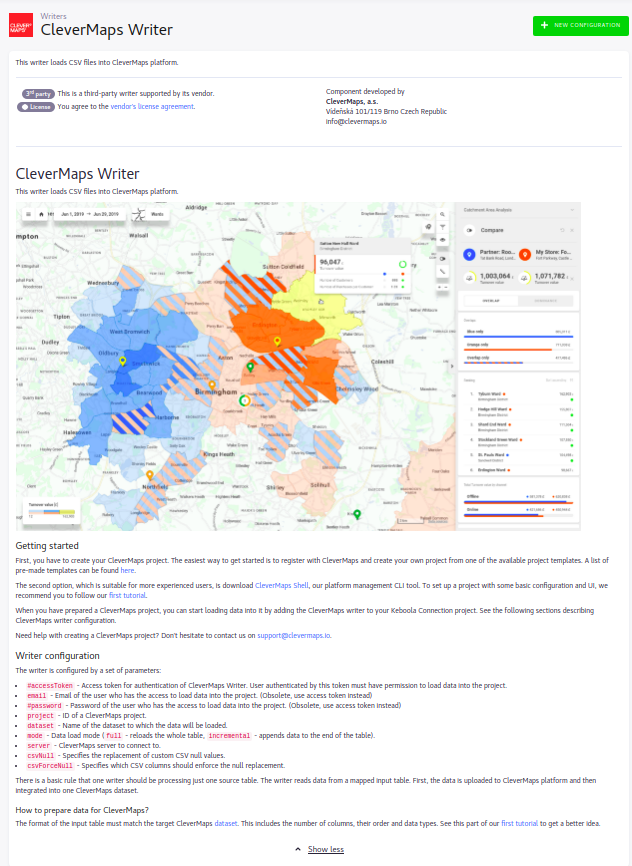
CleverMaps Writer setup
-
CleverMaps Writer is a component which will load data from our Sheet into specific dataset in your CleverMaps project.
-
To setup the CleverMaps Writer, click on the “Components“ and then choose “Writers“.
-
Write “CleverMaps“ into the search form and then choose “CleverMaps Writer” from the search results.
-
Follow the instructions of the CleverMaps Writer and create a new configuration. Basically you define a projectId, credentials and the destination dataset of the CleverMaps project, where the data from our Google Sheet will be loaded.
Orchestration setup
-
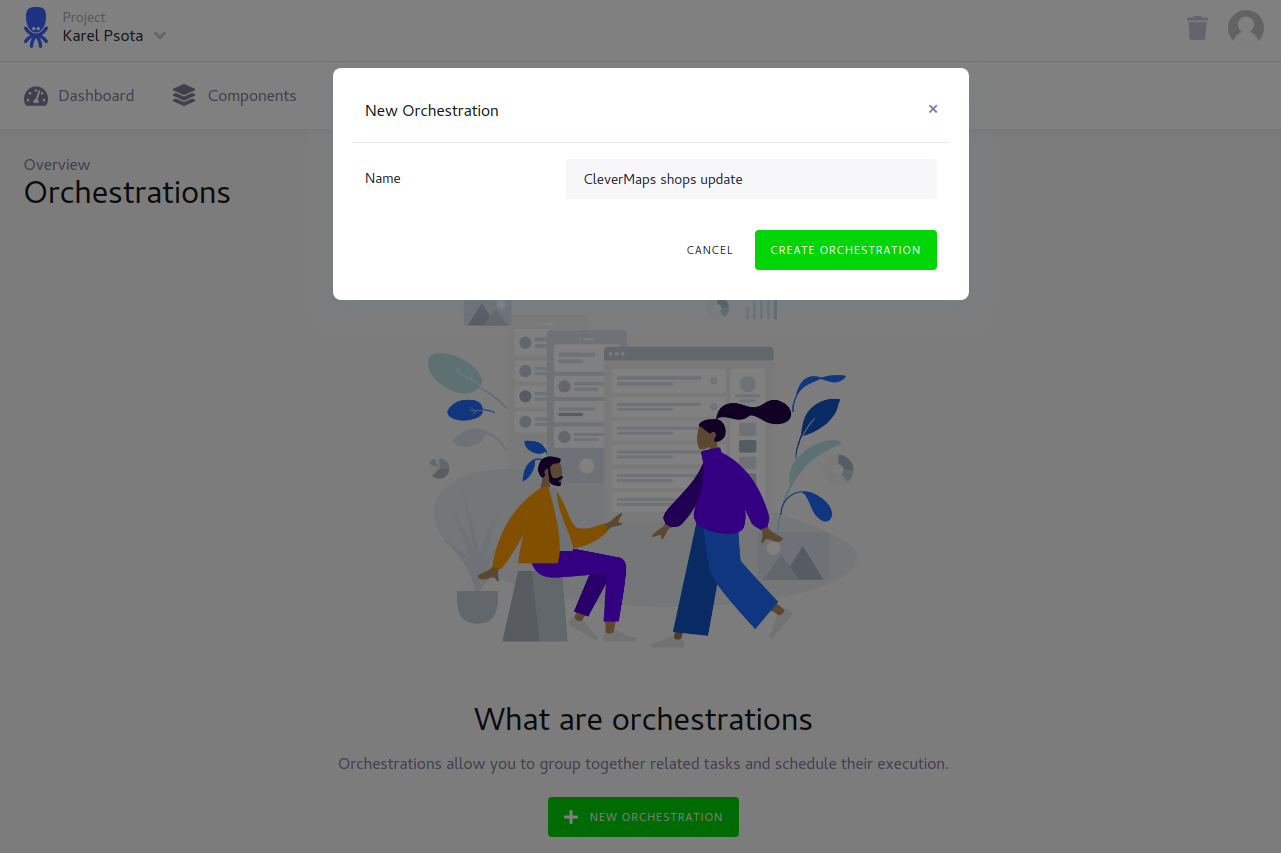
Final step is to create an Orchestration which will glue our extractors and writers together. Go to the “Orchestration” tab and click “New Orchestration“.
-
Official documentation can be found here https://help.keboola.com/orchestrator/
-
Set the name and click “Create orchestration“
-
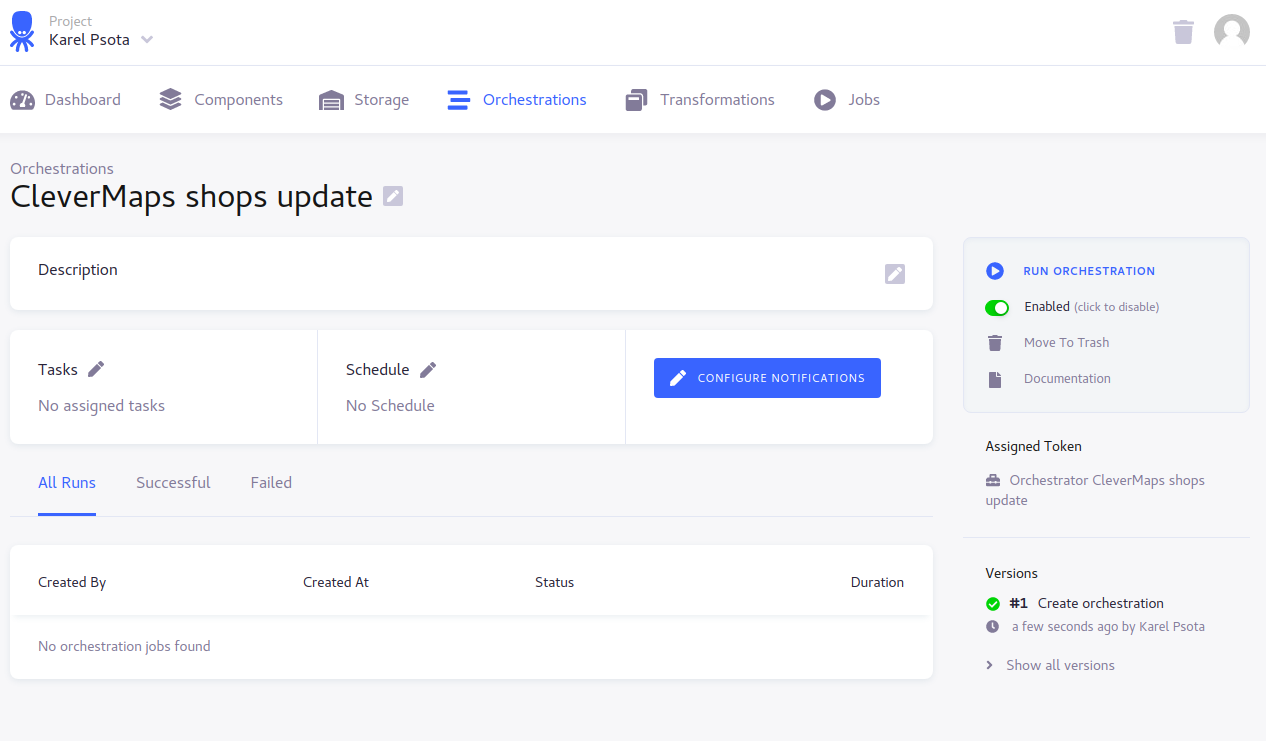
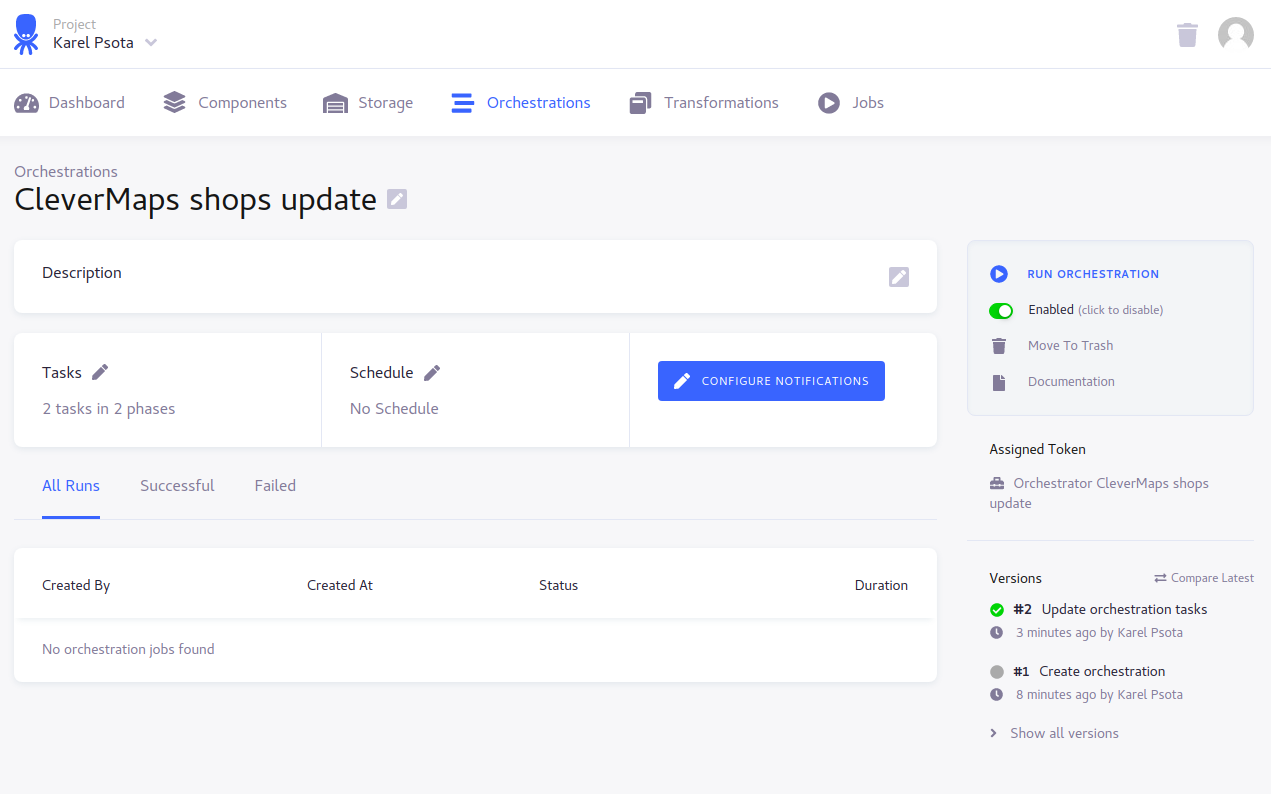
Now you should be redirected into the main Orchestration dashboard where you can make some further configurations.
-
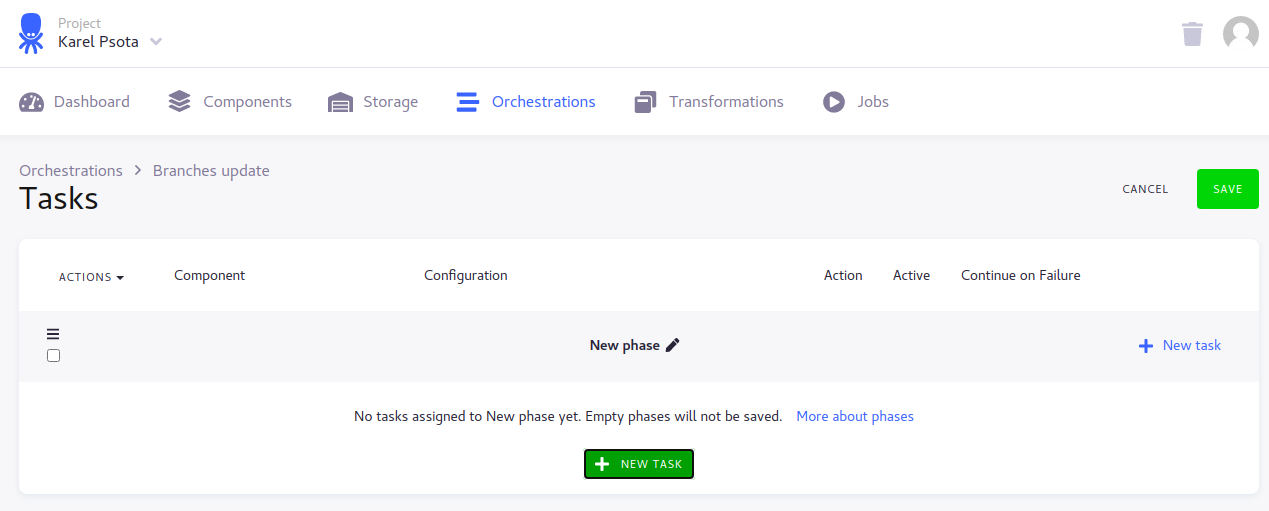
First of all we will add our Google Drive Extractor and CleverMaps Writer configuration. Click edit pencil icon of the “Tasks“
-
Click “New task“
-
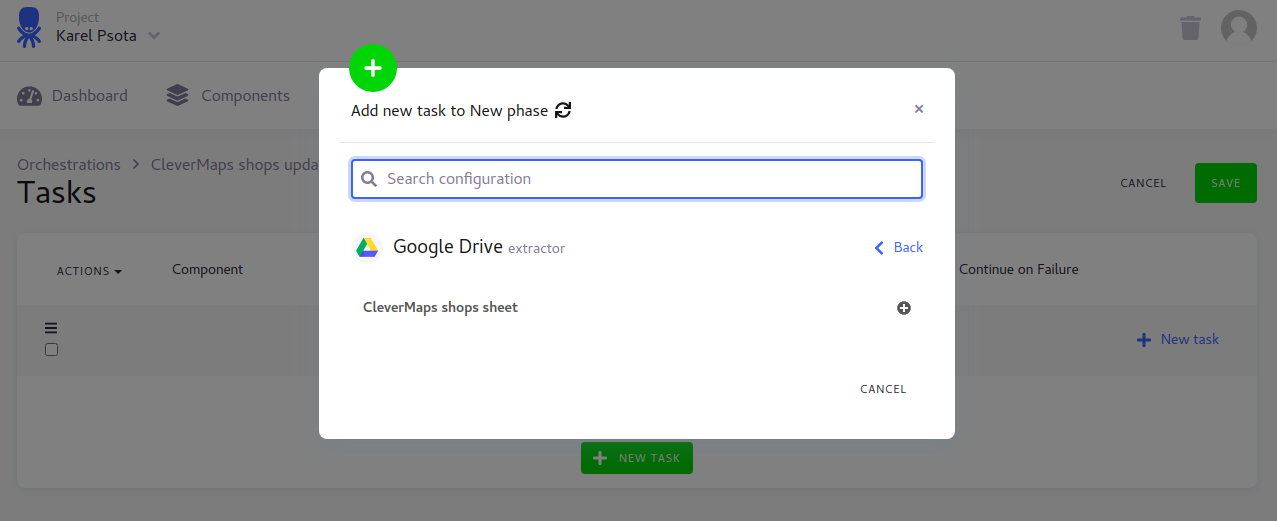
Click “Google Drive Extractor“ and then click on then name of the configuration - in our case “CleverMaps shops sheet“
-
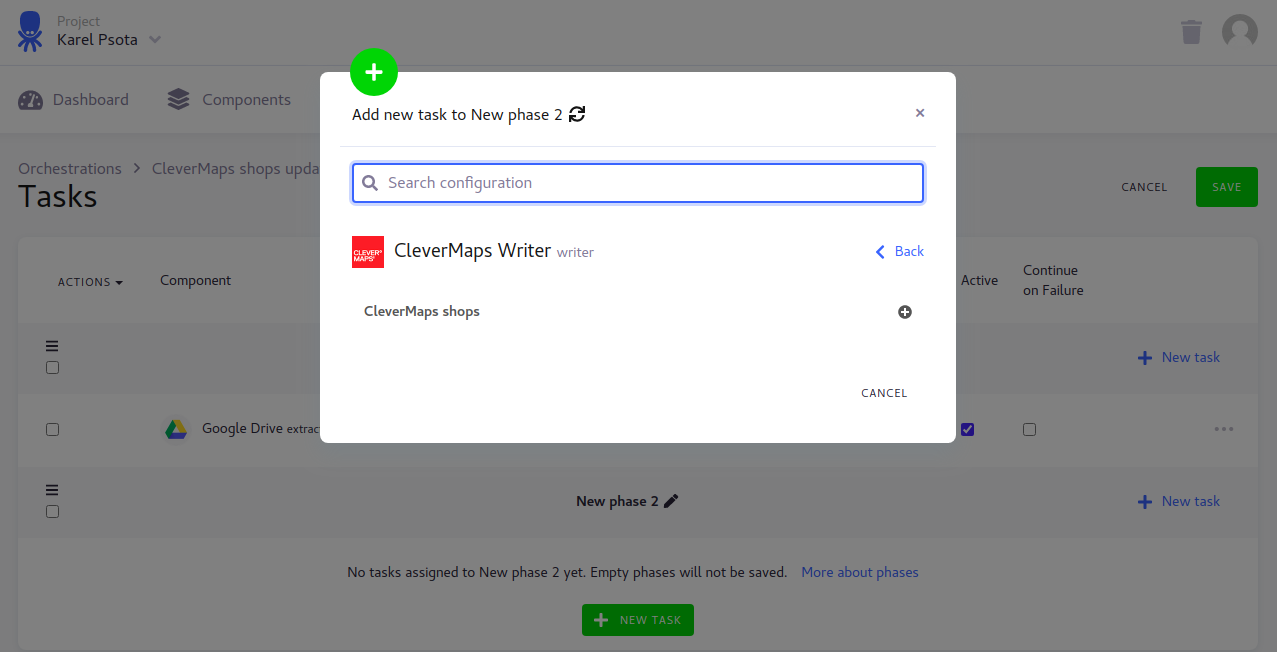
Click “CleverMaps Writer“ and then click on the name of the configuration - in our case “CleverMaps shops“
-
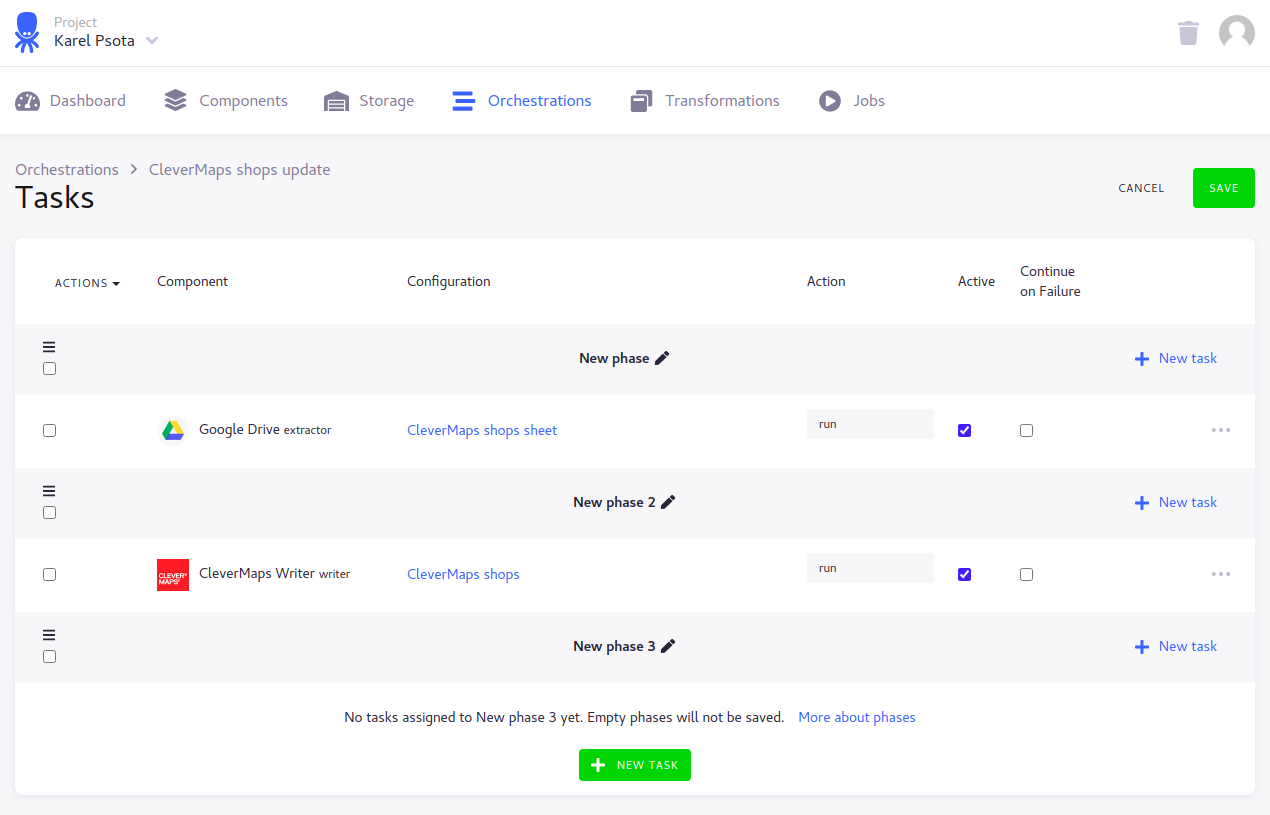
Now you should see CleverMaps Writer in the Tasks overview. Click “Save”.
-
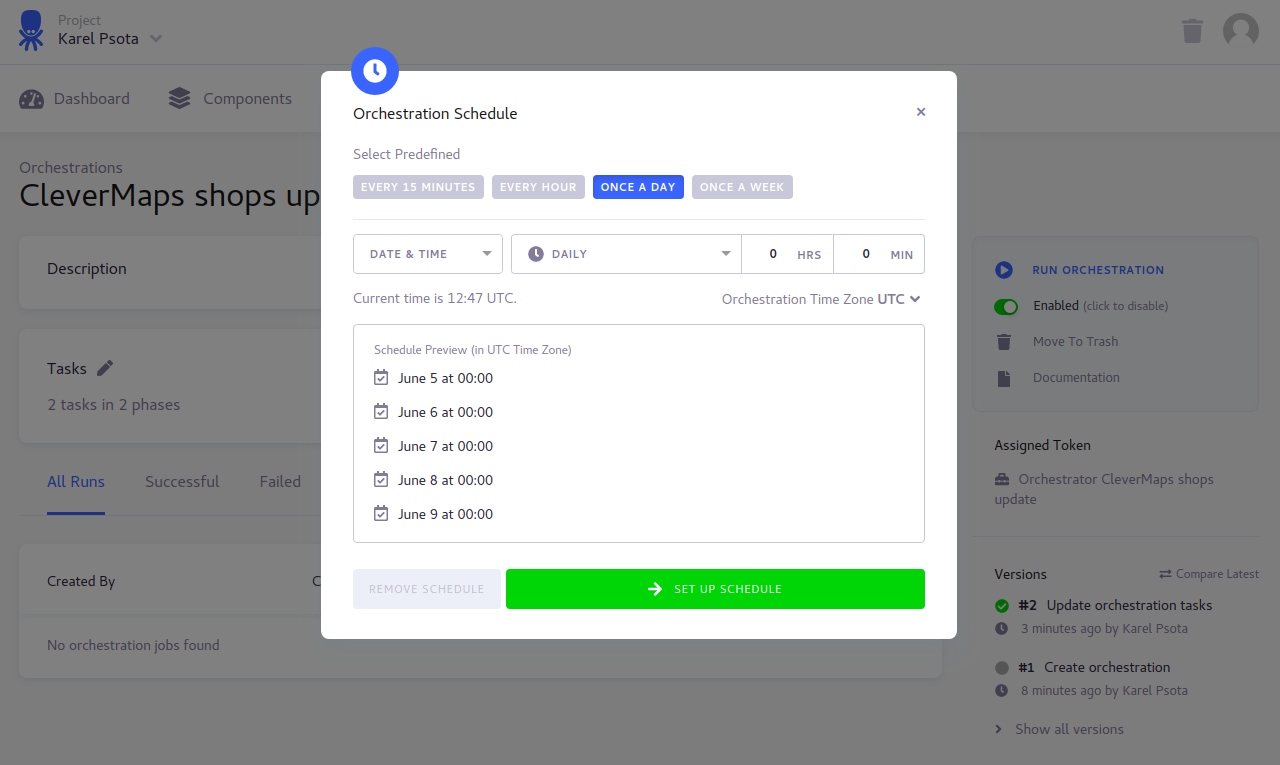
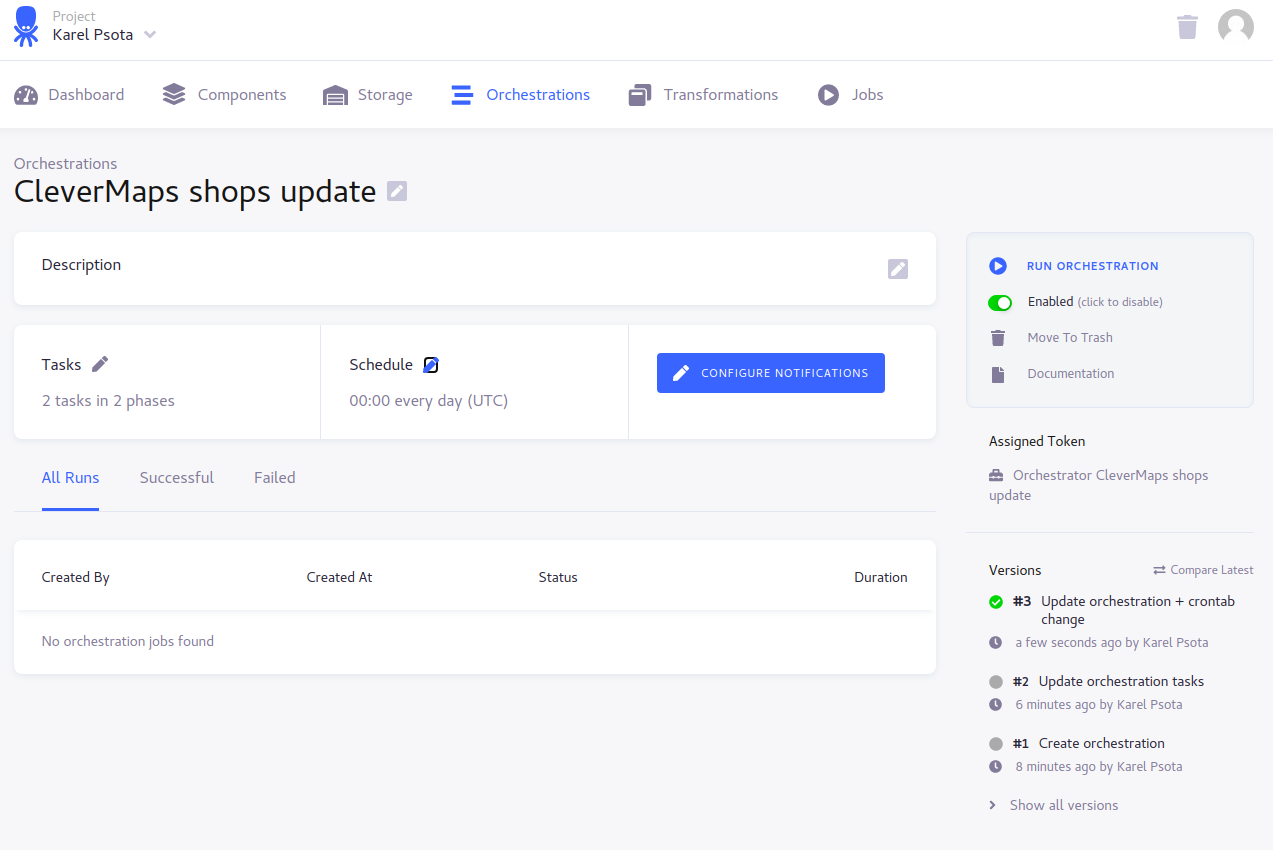
Now is time to setup the schedule of the orchestration. Using a schedule we are telling the Keboola when the data update process should be executed. Click edit pencil icon of the “Schedule“ and setup a day and time according your needs. In our case is it Once a day at 00:00.
-
Finally you can setup notifications using “Configure Notifications“ to selected email addresses. It is very useful in case of data pipeline failure.
-
This was last step in our data pipeline setup. It is advised to make some test run using “Run orchestration“.